



The Fortify router integrates with ExpressVPN, allowing you to set up a VPN connection that uses ExpressVPN’s high-speed servers and strong encryption. The steps below will show you how to set up a VPN tunnel and configure rules for your devices and connections.
Jump to…
Open the ExpressVPN dashboard
Add and configure a VPN tunnel
Select client sources
Select target destinations
Activate a VPN tunnel
Deactivate a VPN tunnel
Add additional VPN tunnels
Configure VPN tunnel priority
Rename a tunnel
Delete a tunnel
Open the ExpressVPN dashboard
- In your browser, go to 192.168.8.1 to access the router admin panel.
- Log in with your admin credentials.
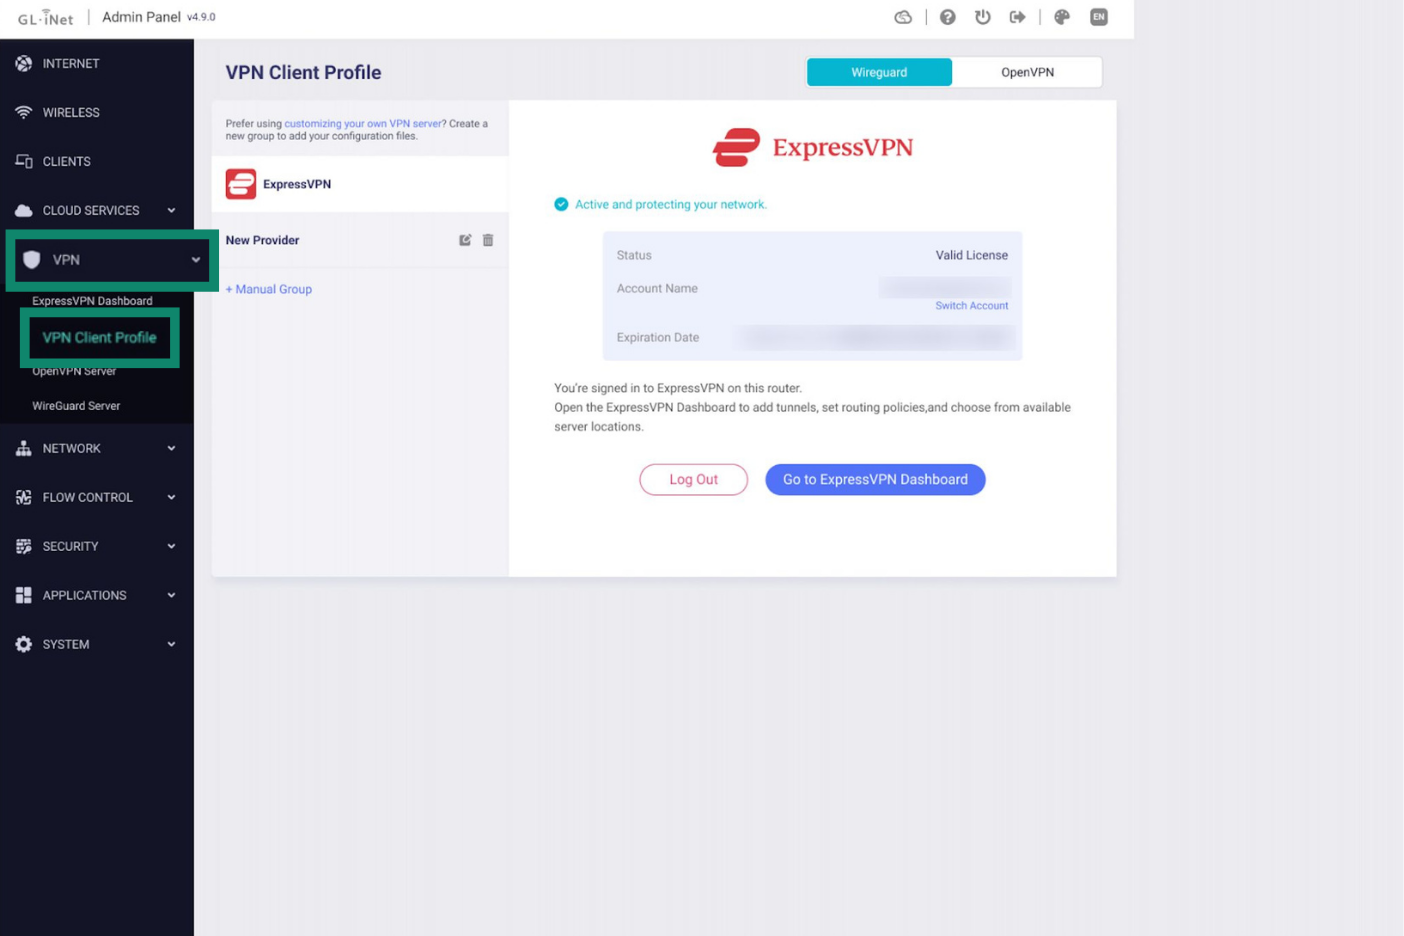
- Go to VPN > VPN Client Profile.

- Log into or activate your ExpressVPN account if you have yet to do so.
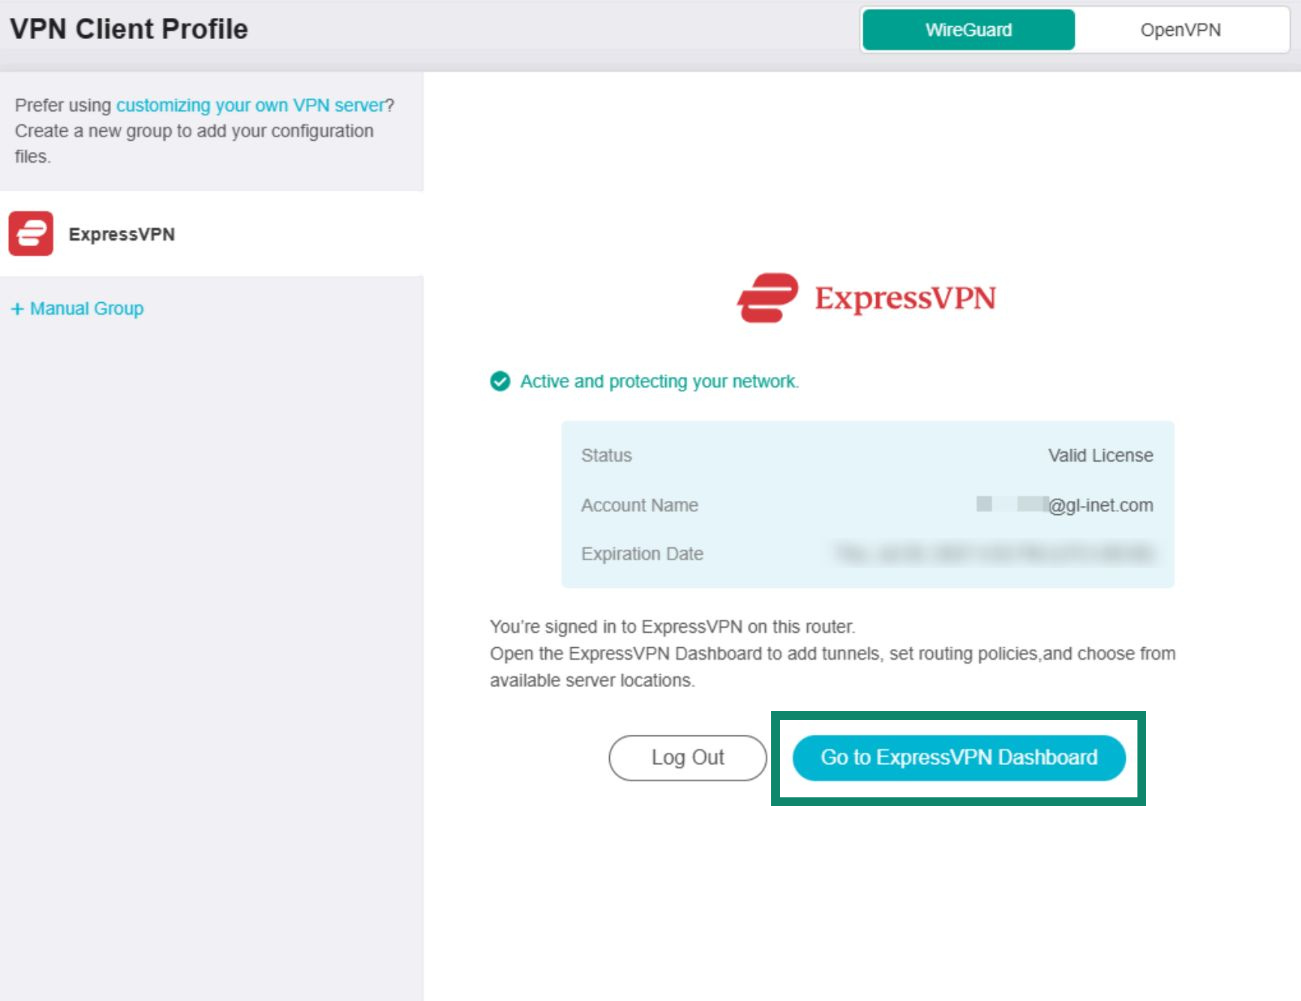
- Once you have signed into your ExpressVPN account, you’ll see a tab that displays information about your license. Click Go to ExpressVPN Dashboard to start setting up the VPN, and follow the instructions below.


Need help? Contact the ExpressVPN Support Team for immediate assistance.
Add and configure a VPN tunnel
In the ExpressVPN Dashboard window, click Add VPN Tunnel.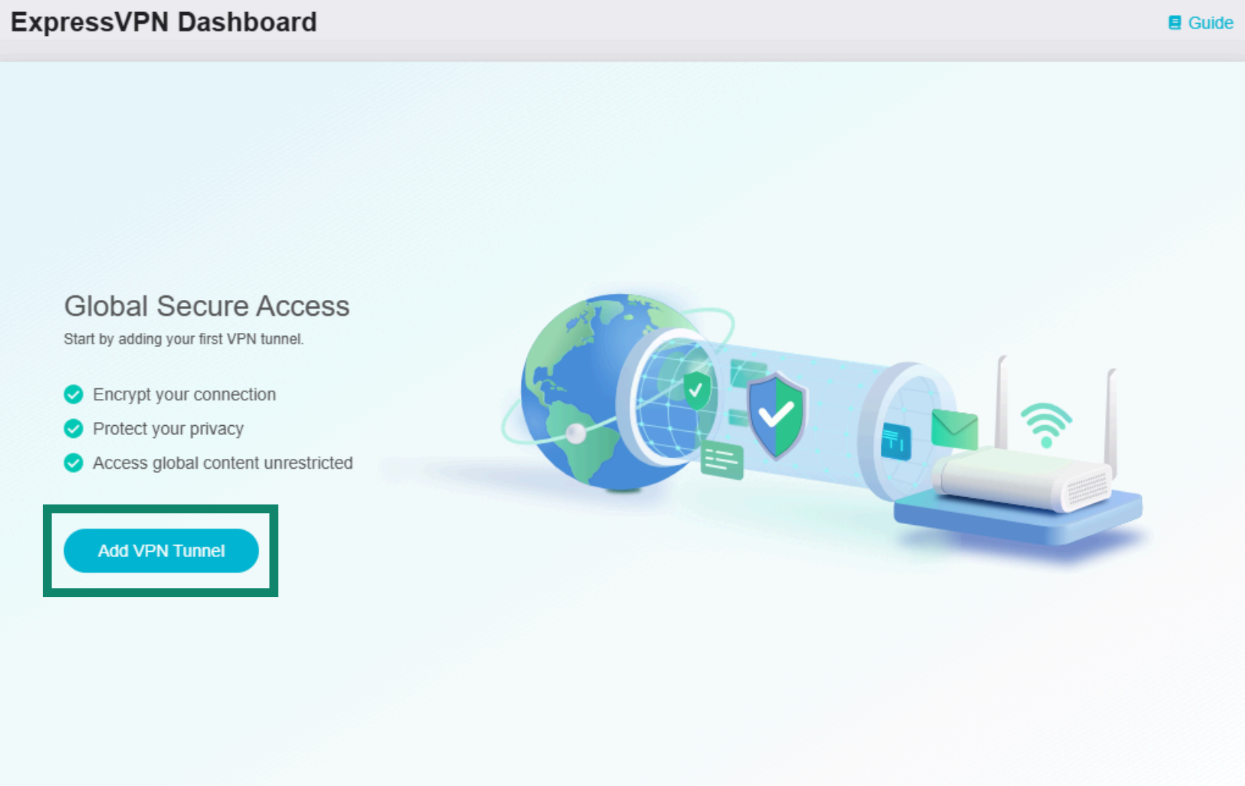
A list of VPN server locations, called profiles, will open. Click the profiles you want to use. You can also use the search bar to manually look for a specific server location.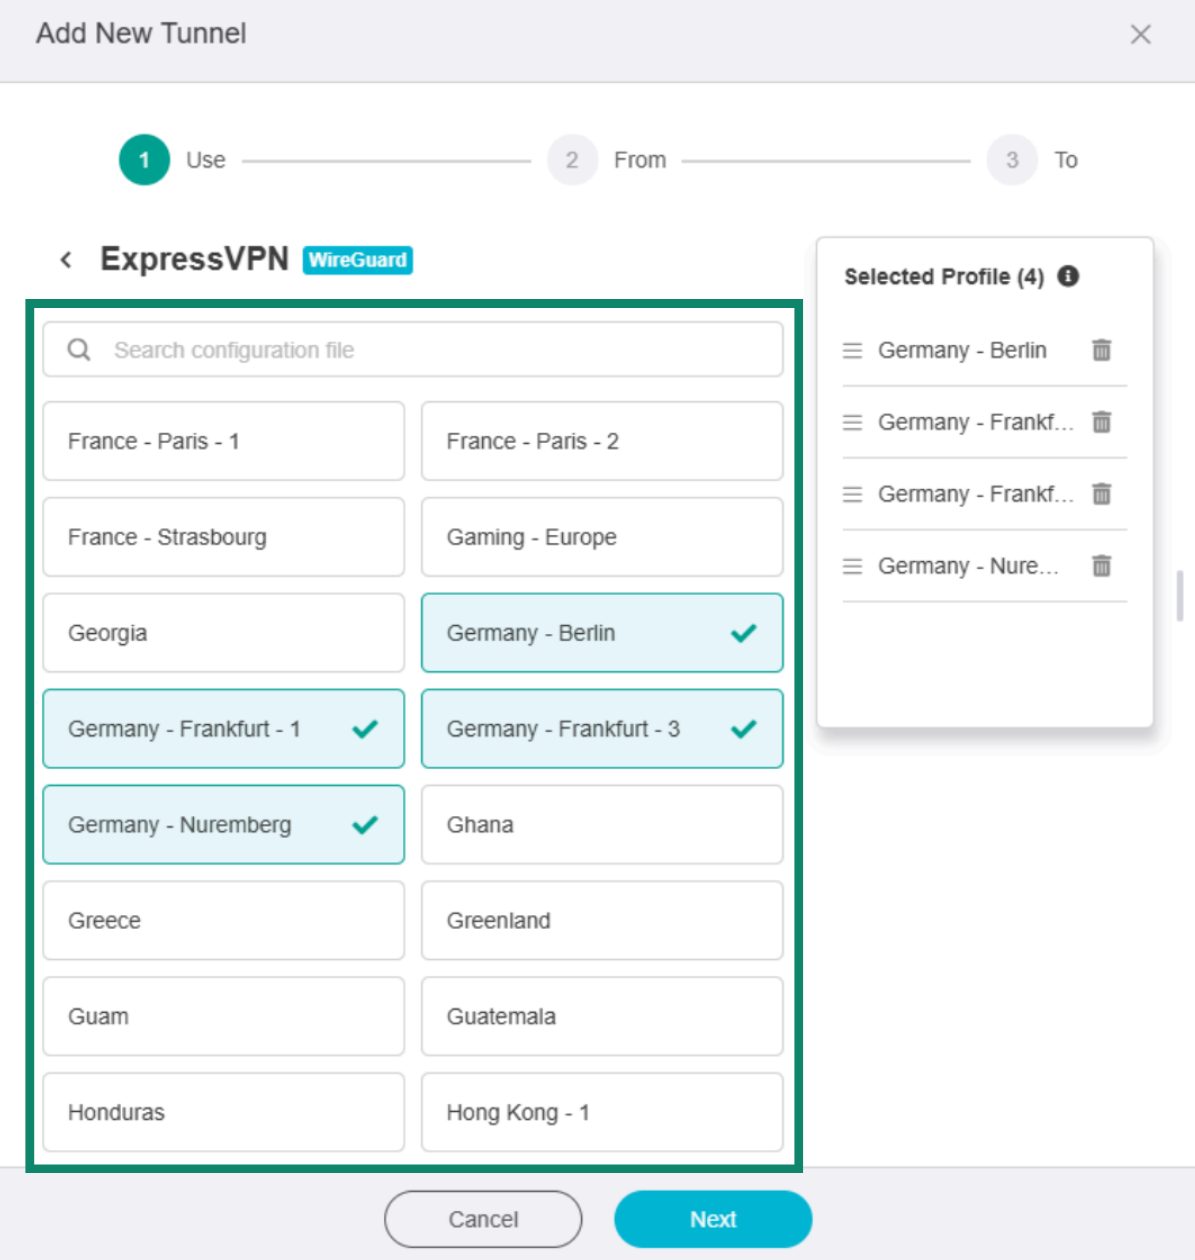
When you select a server location, it will show up on the Selected Profile list on the right.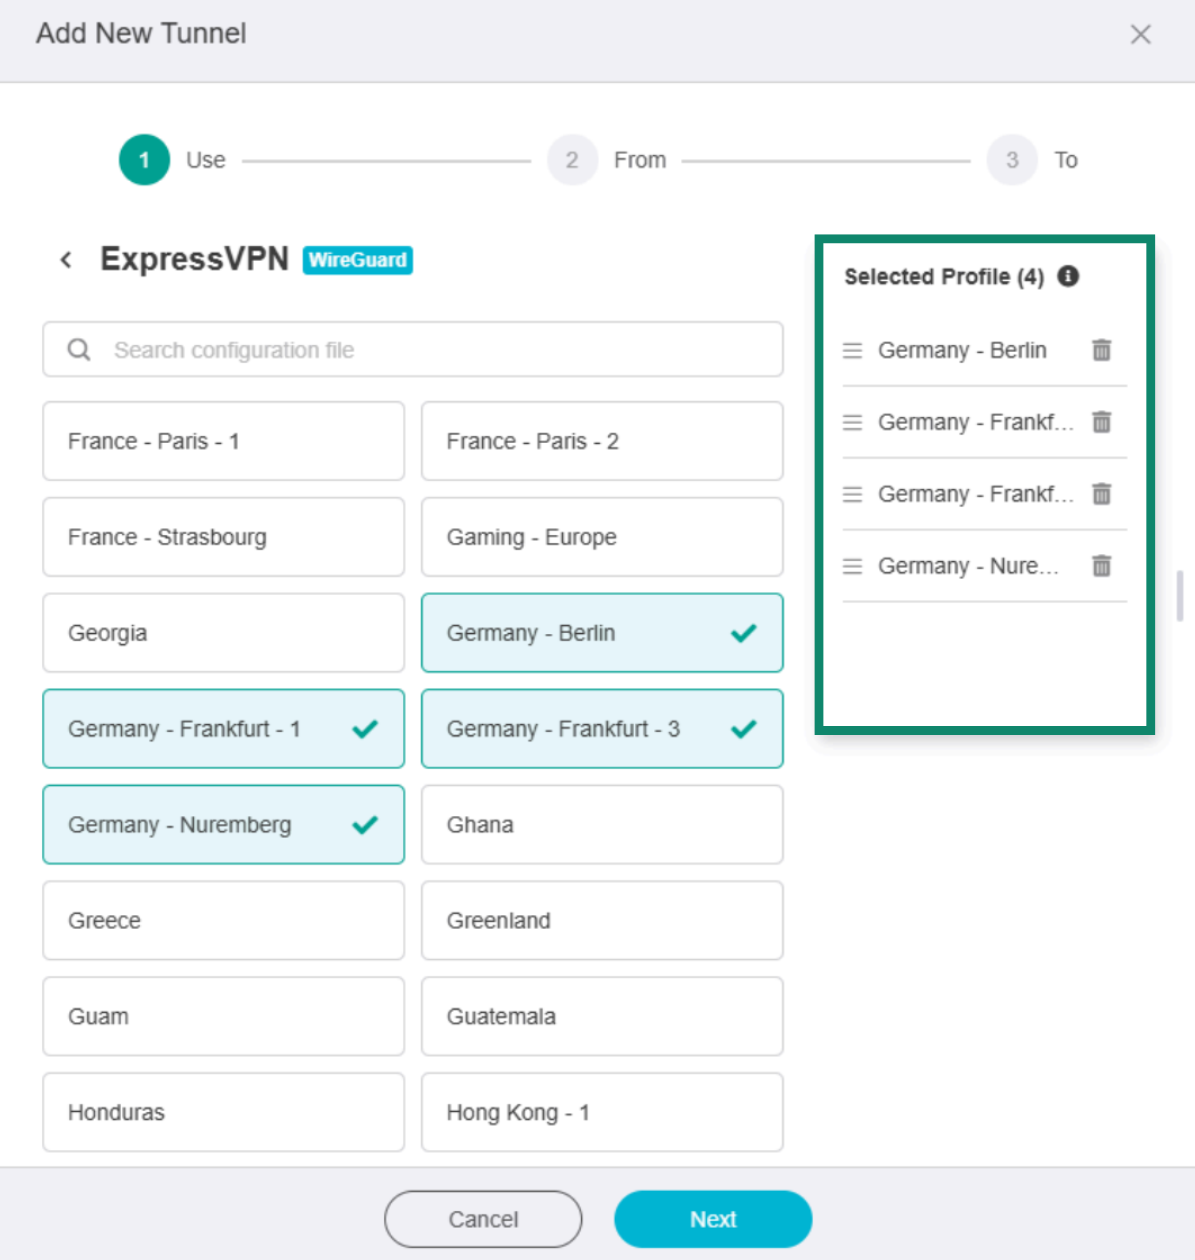
If you select multiple server locations, the VPN will attempt to connect to each one using the order they appear in on the Selected Profile list. If it cannot connect to one location, it tries the next one on the list until it successfully establishes a connection.
To change the profile priority, click and hold ☰ next to a specific location in the Selected Profile list to change its order.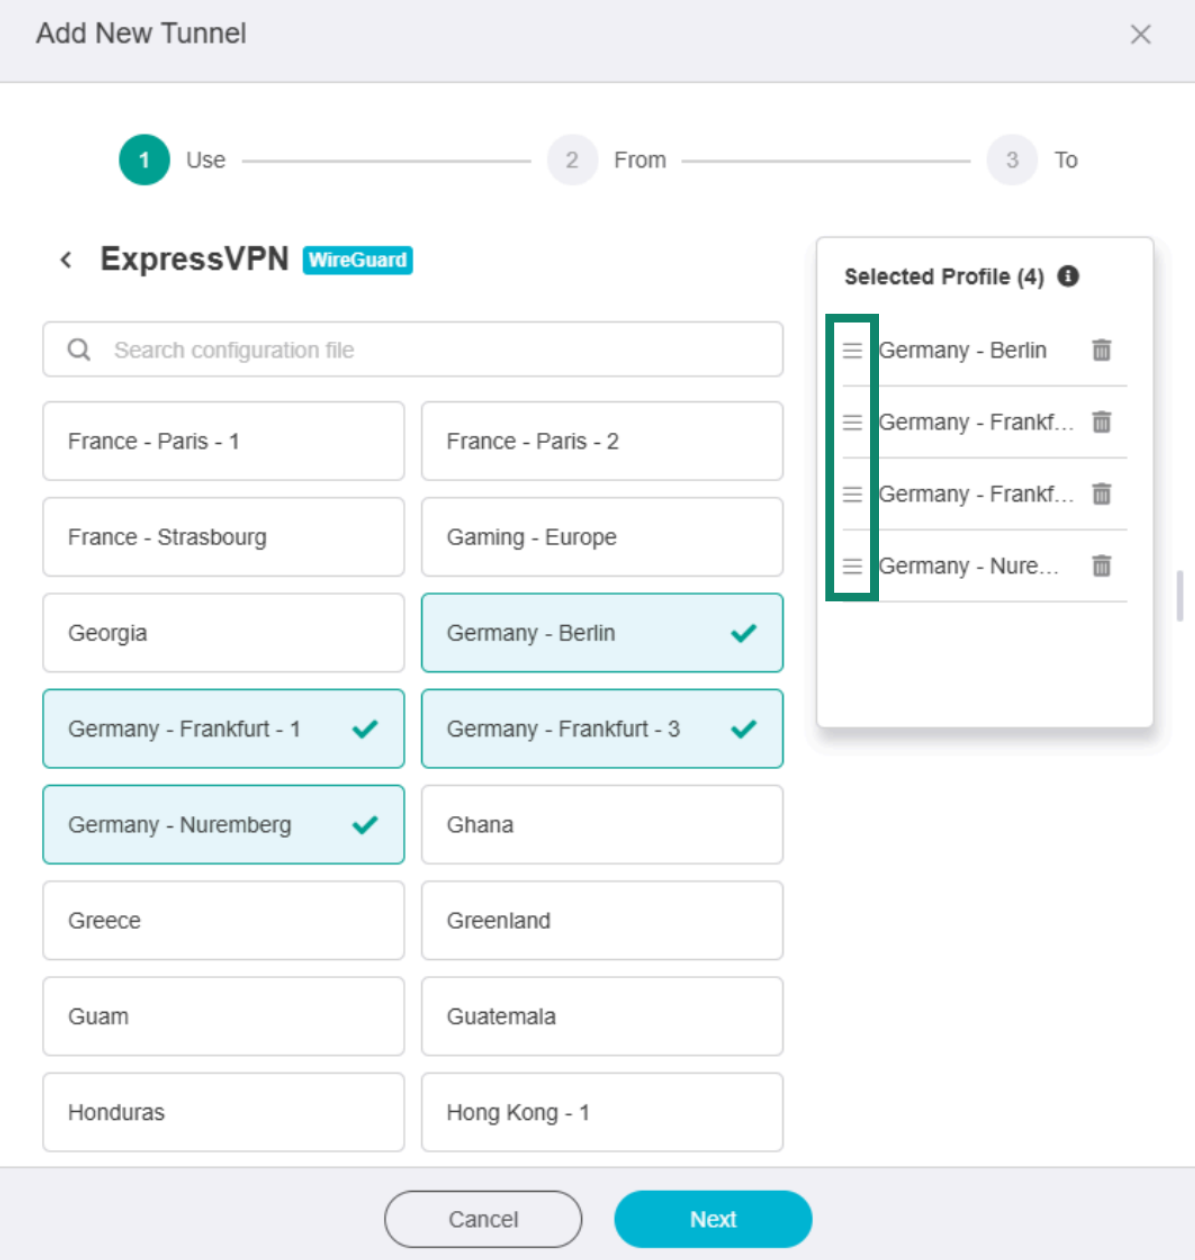
To remove a location from the Selected Profile list, click the trashcan icon next to it.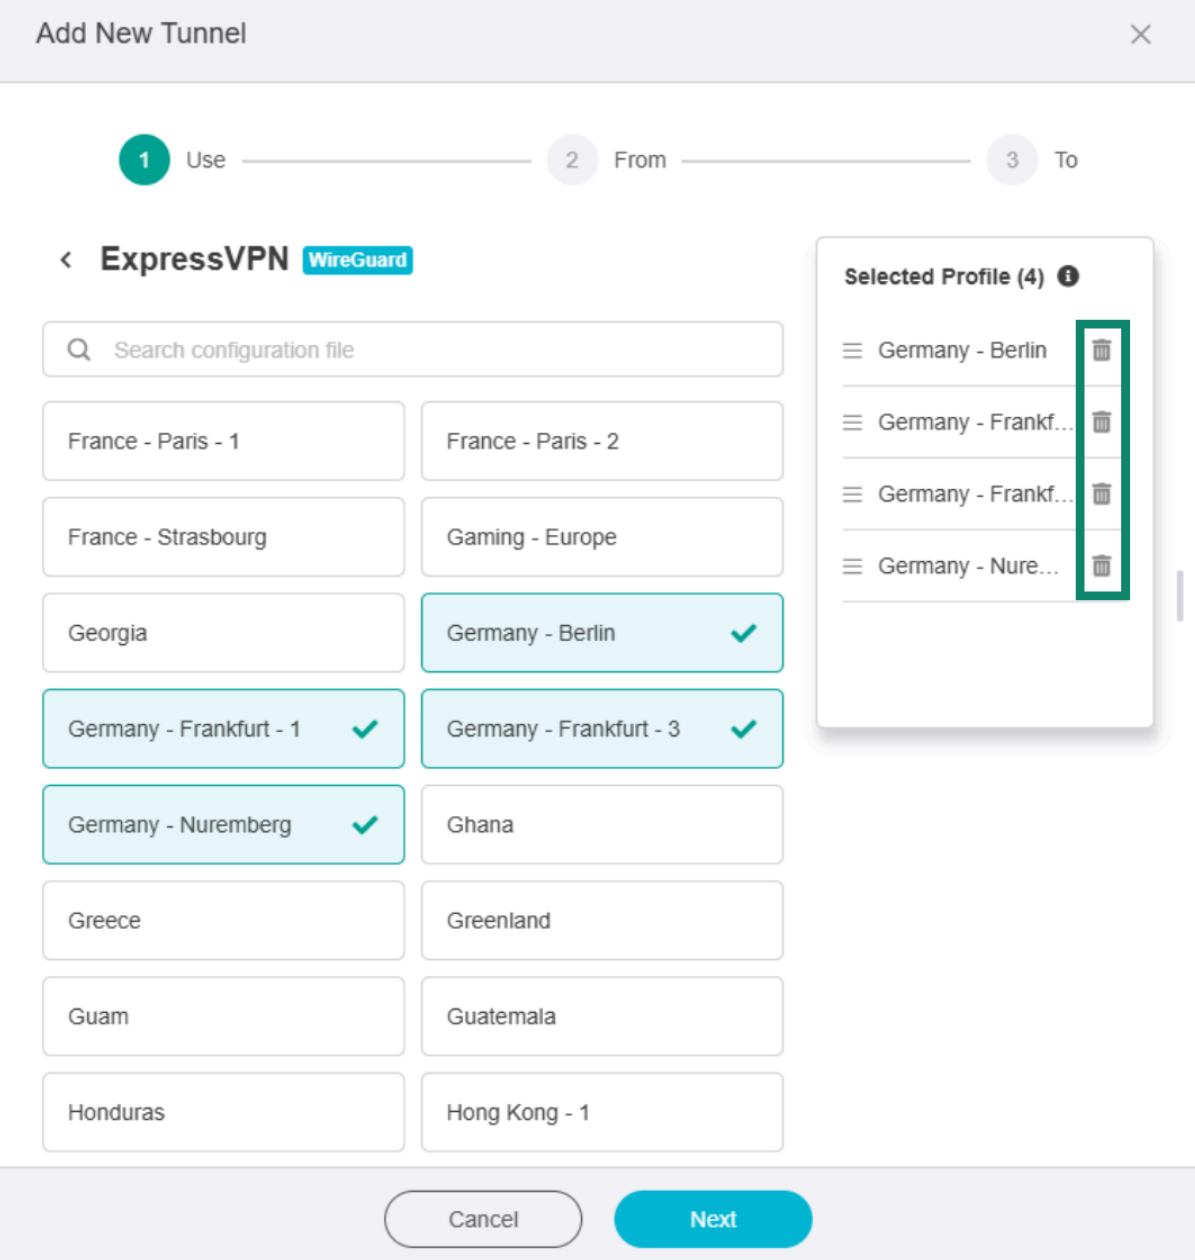
When done, click Next.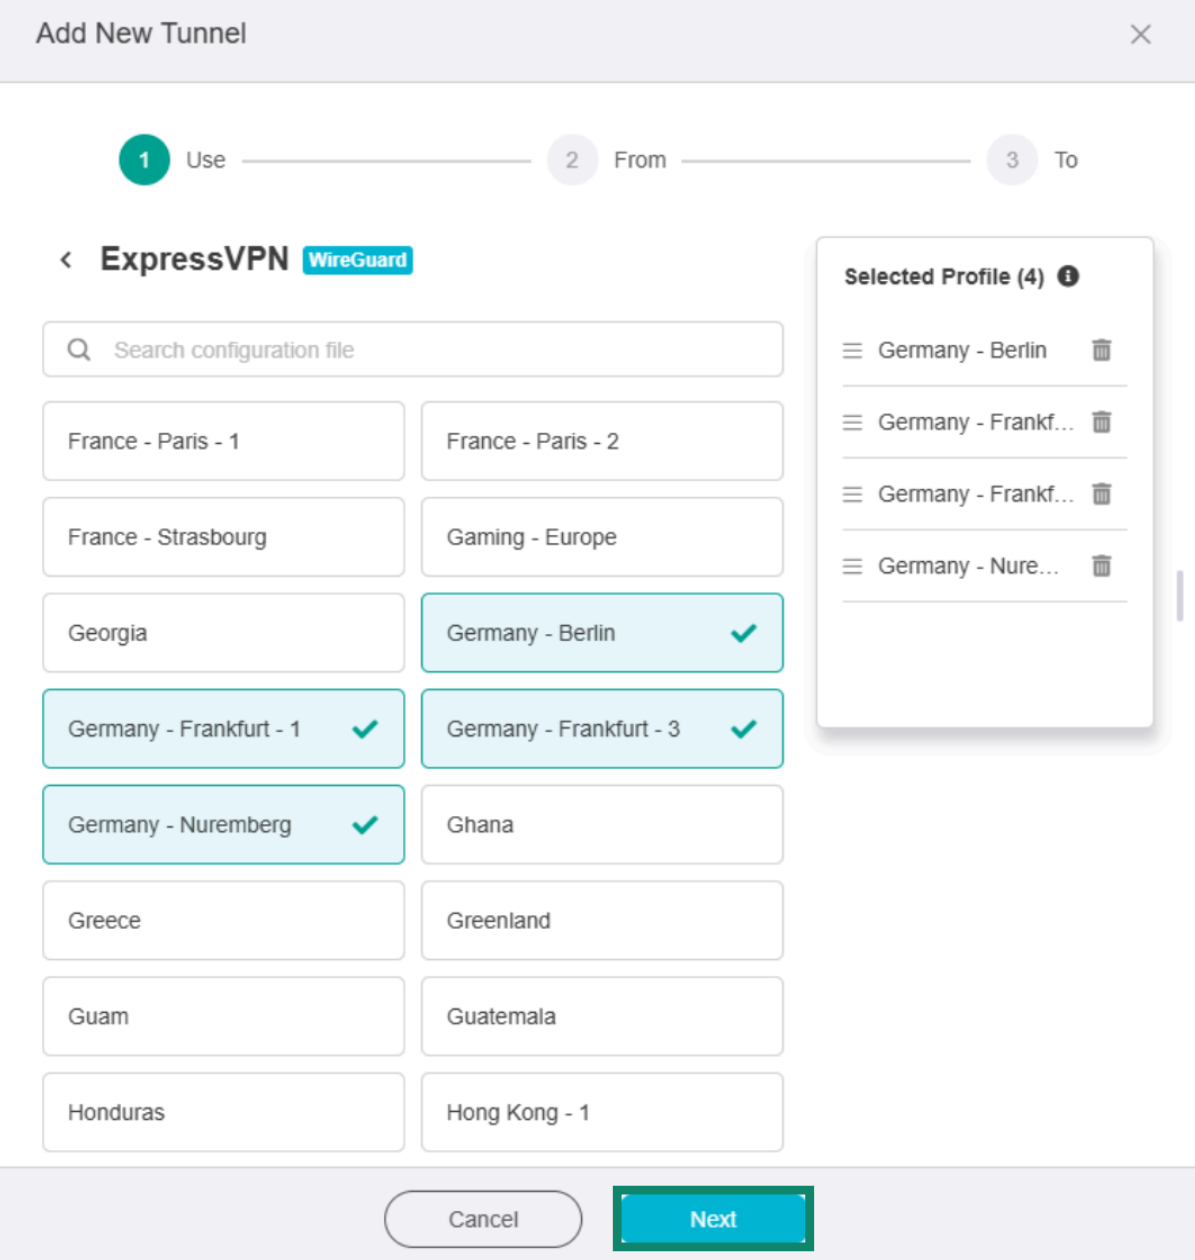
Select client sources
Choose which devices or types of connections on your router should use this VPN tunnel. Later, you can create additional VPN tunnels for different groups of devices or connections.
You can choose from four options:
All internet traffic from every device connected to your Fortify router goes through the VPN tunnel. This means that every device on your network that accesses the internet will use this VPN connection when this tunnel is active.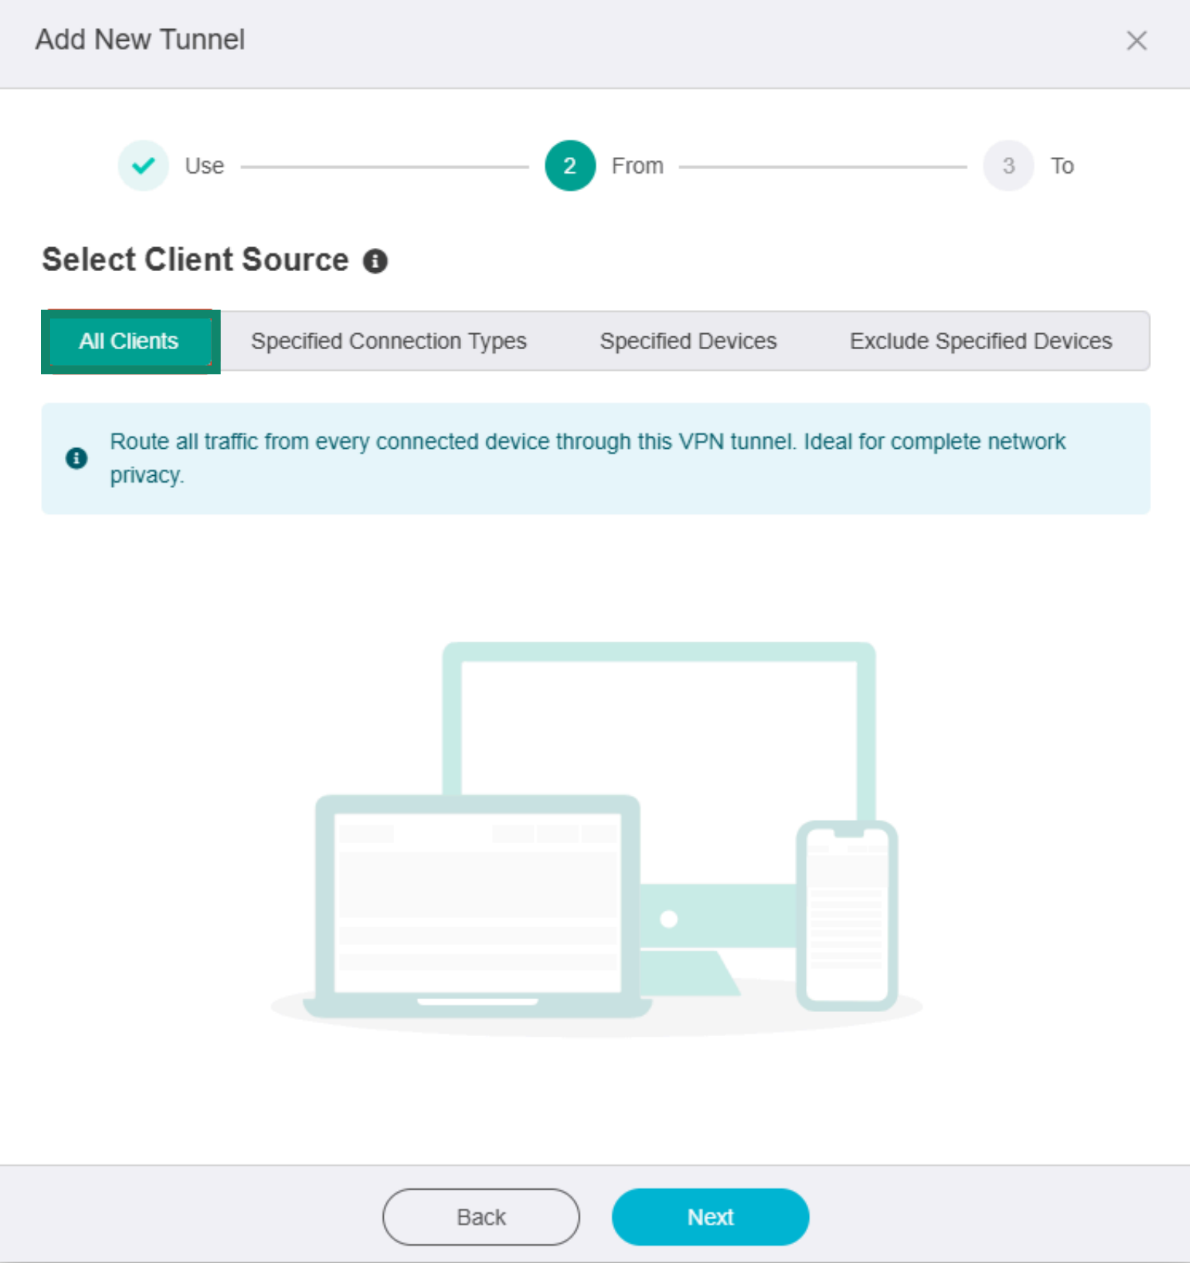
The VPN tunnel is only used for internet traffic from specific network interfaces, like your local network, guest Wi-Fi, or connected device networks.To select a network interface, click the desired connection type.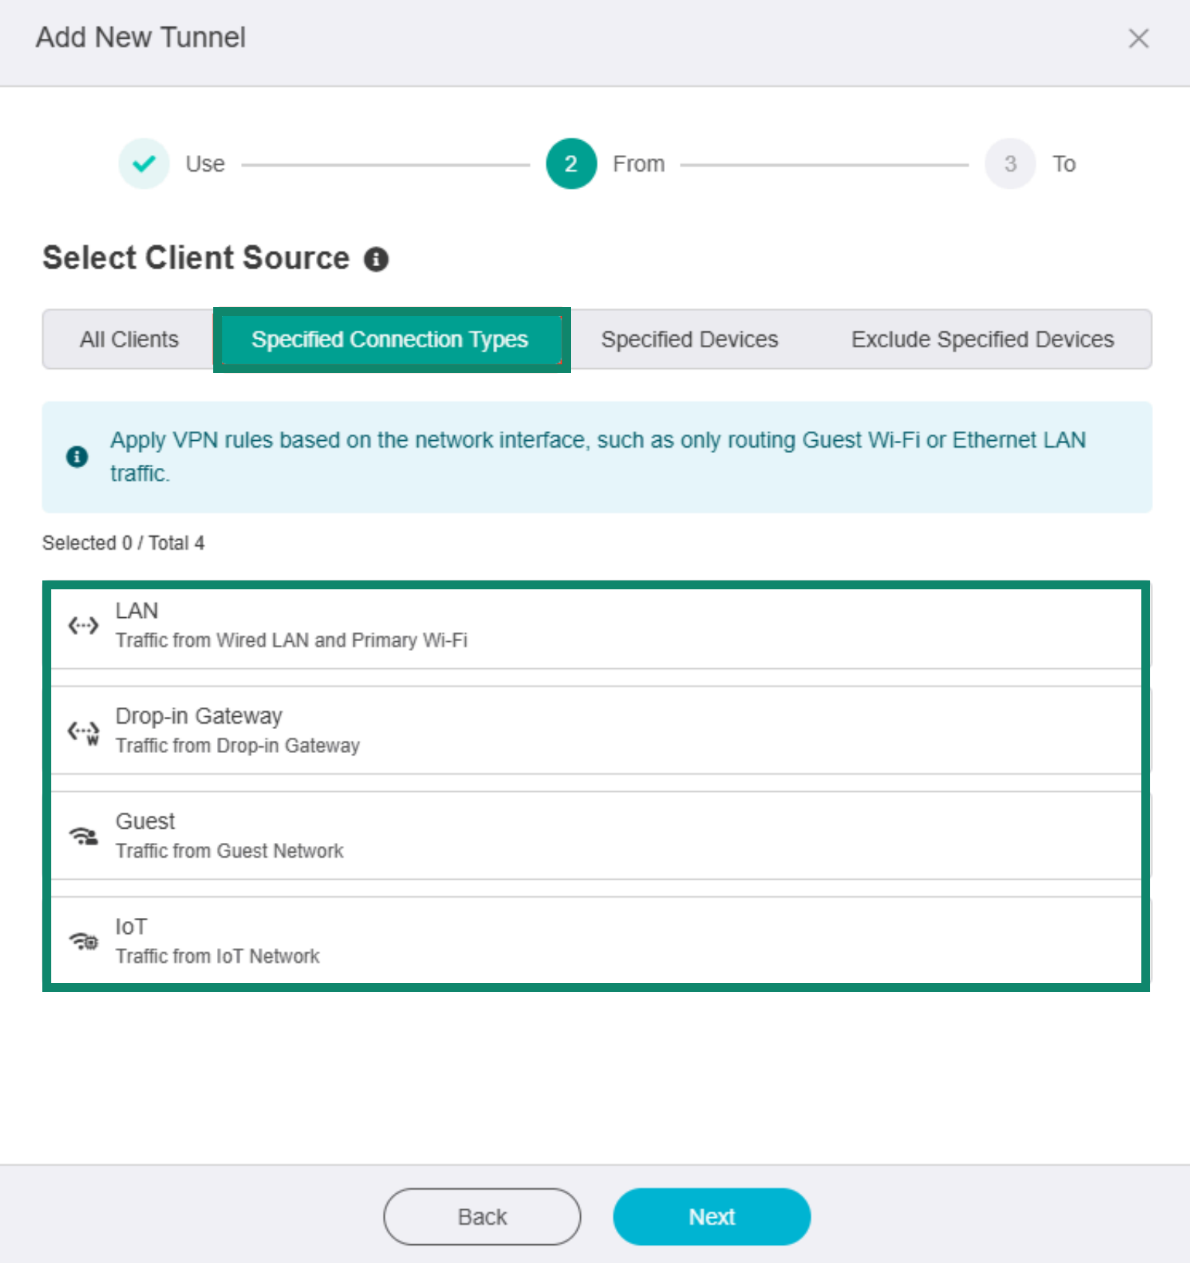
Only internet traffic from the devices you select here goes through this VPN tunnel. Devices you leave unselected will bypass this VPN connection.To select a device, click from the available options displayed under Add Device.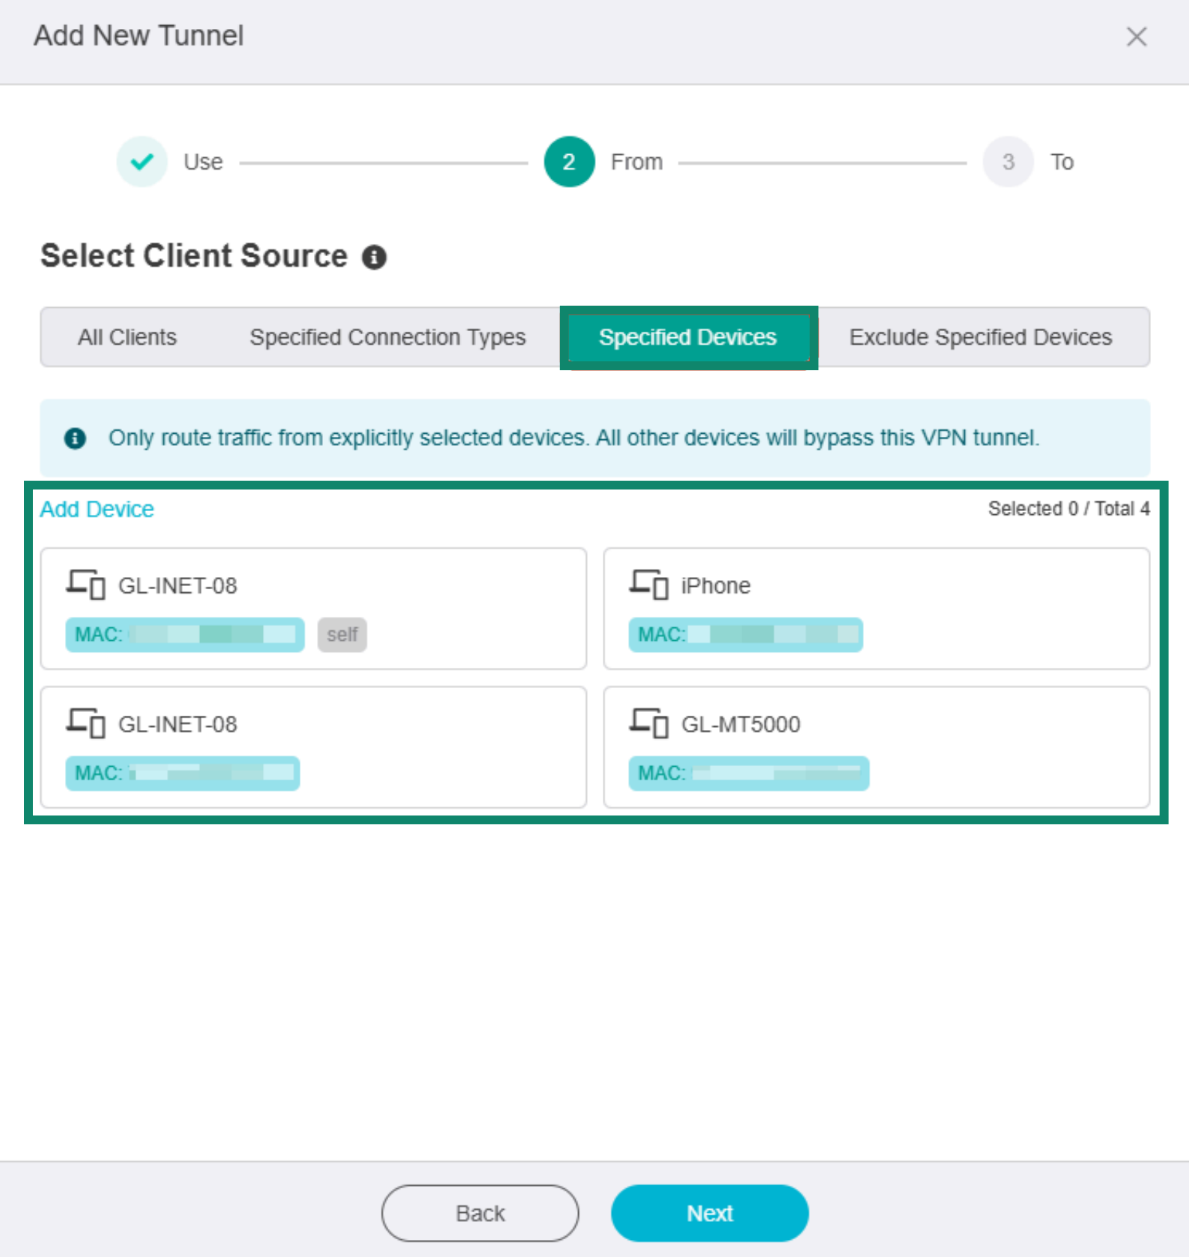
All internet traffic goes through this VPN tunnel, except for the selected devices. For example, you may choose to exclude your gaming console from a certain VPN tunnel so that it uses your local internet connection (or a different tunnel).To exclude a device, click the available options shown under Add Device.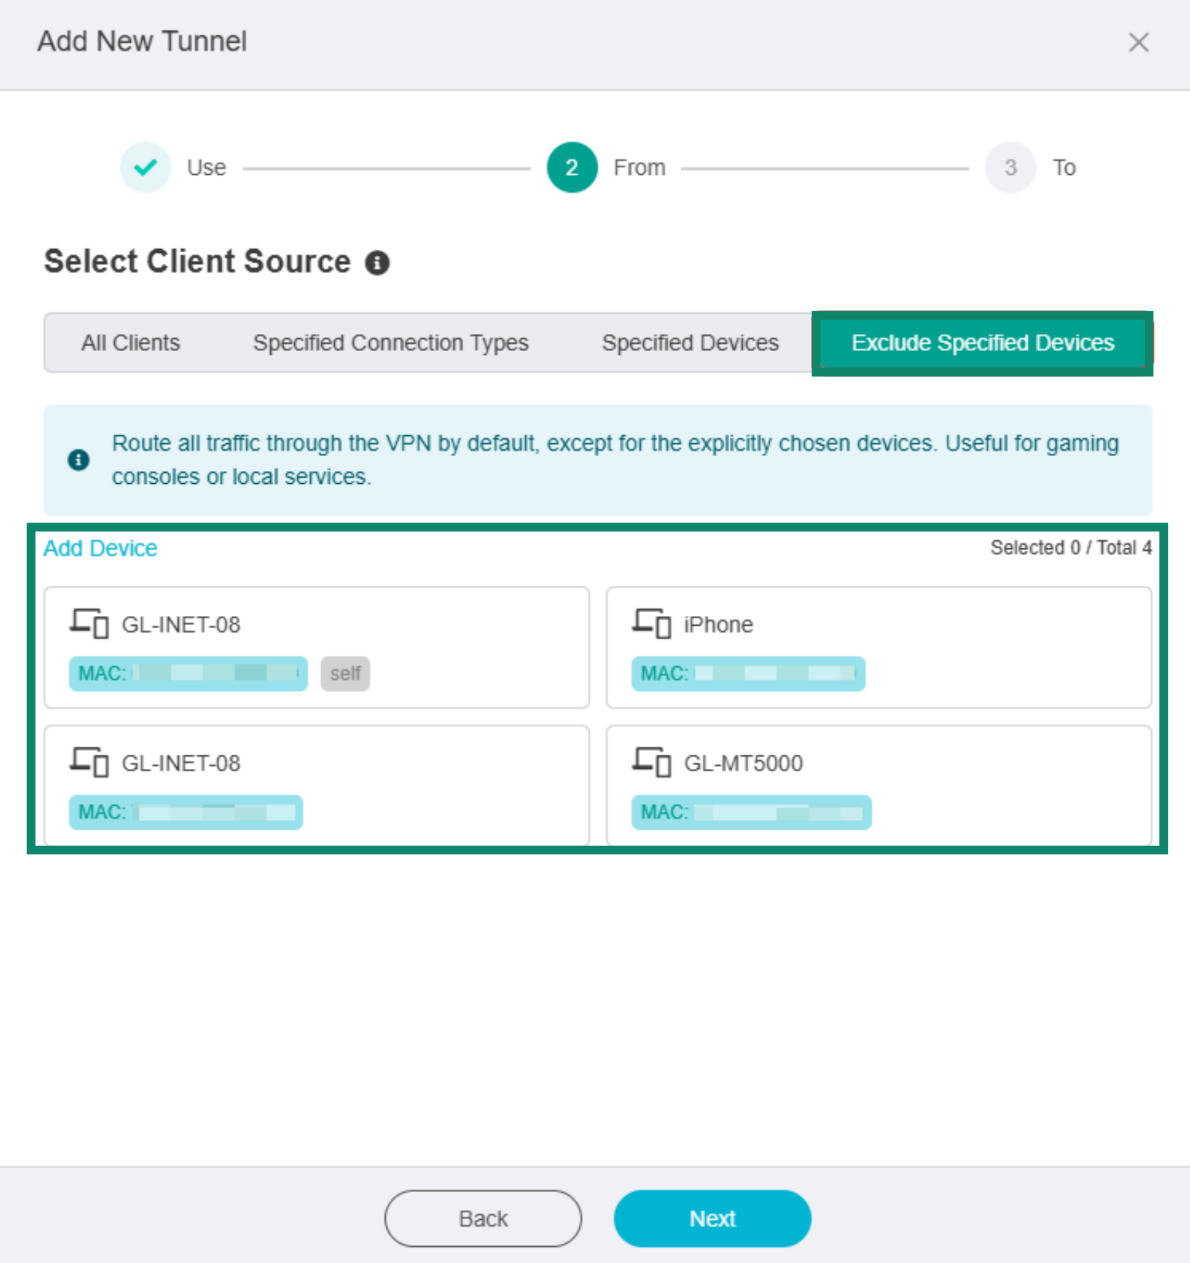
Click the desired rule, select device or connection types if needed, then click Next to continue.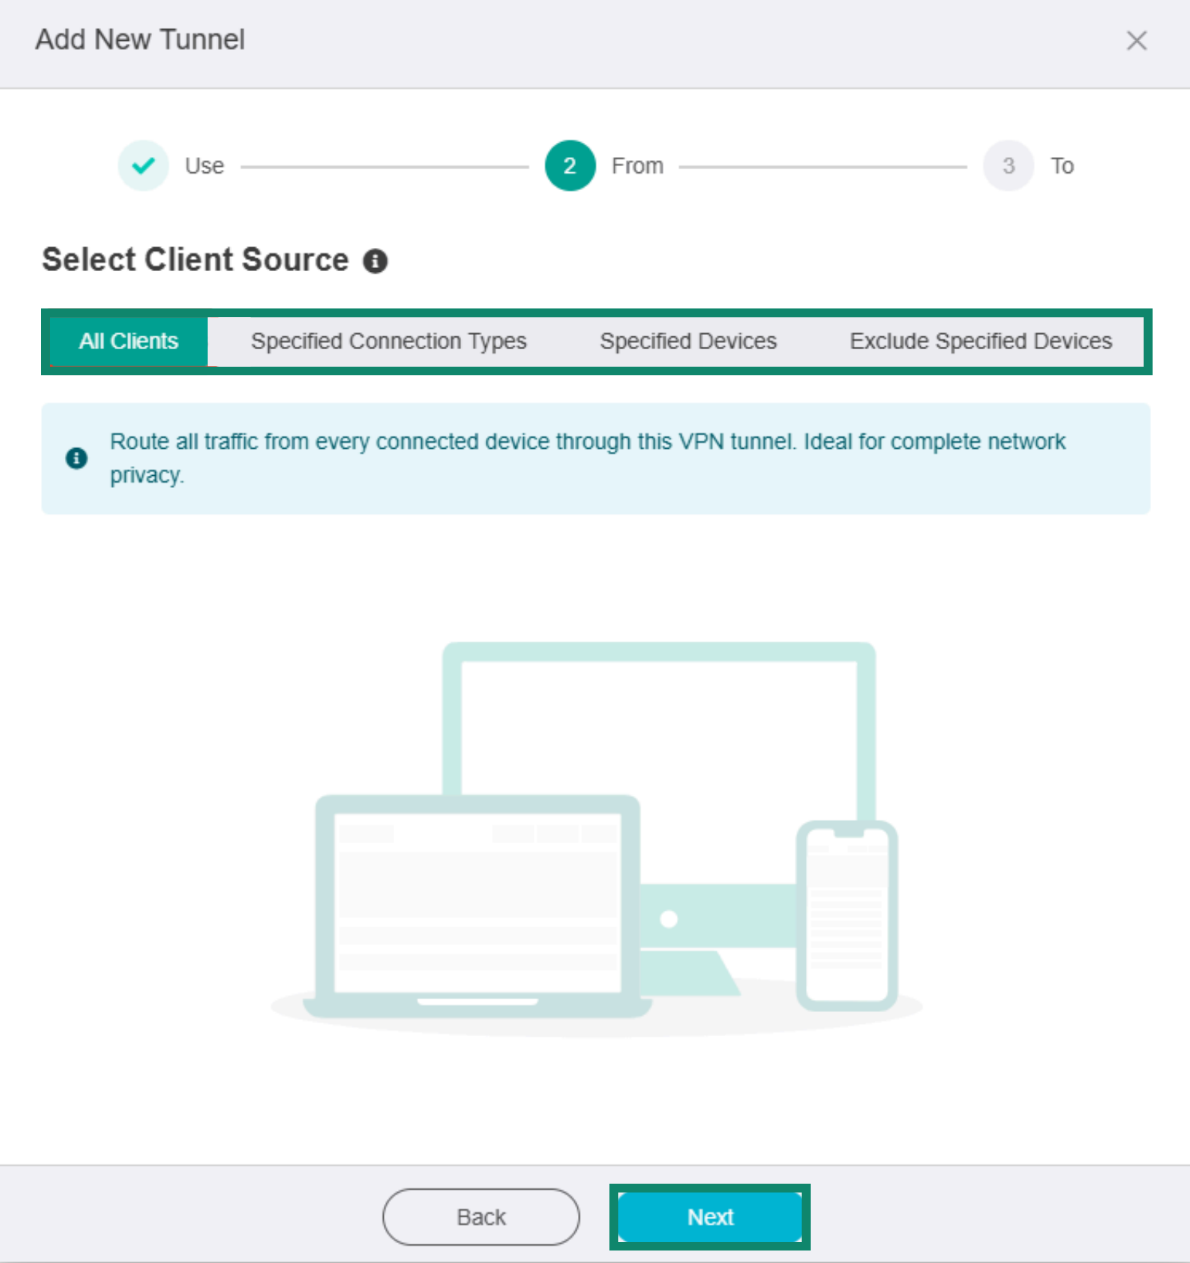
Select target destinations
Choose which online services use the VPN connection and which use your regular internet connection. Later, you can create additional tunnels for different types of apps and websites.
You can select from three options:
Routes traffic to all targets through the VPN tunnel. This means every online service you access on the device or connection types you previously selected will use this VPN tunnel.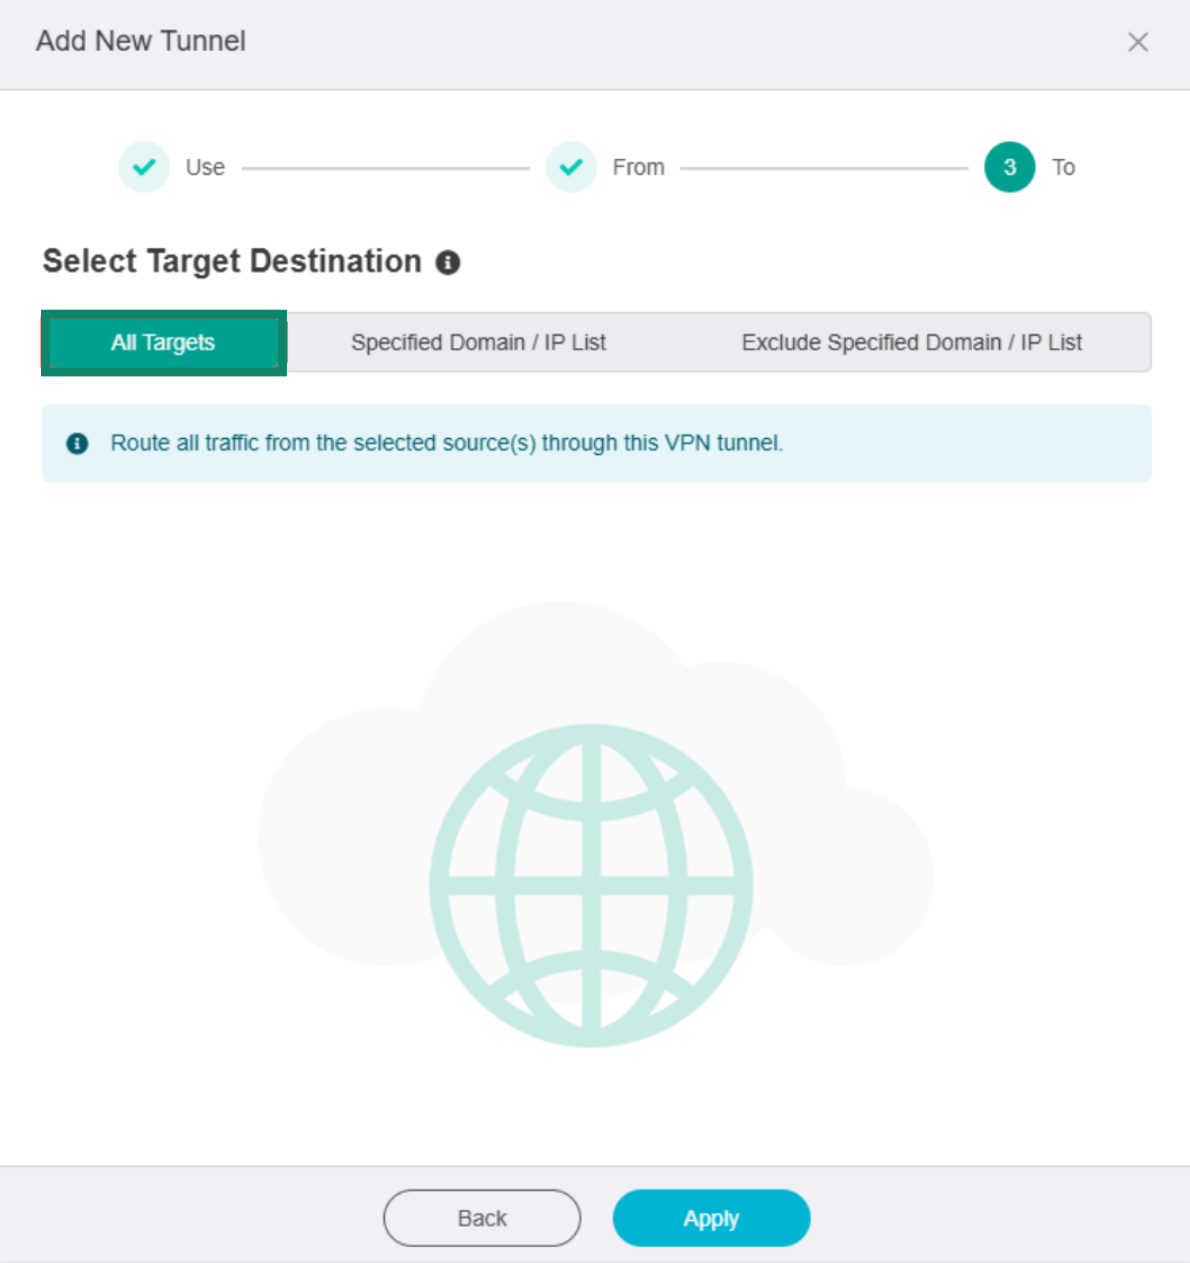
Only your traffic to the websites or IP addresses you list here will use this VPN tunnel; web traffic to other websites and services bypasses the VPN connection (or follows another tunnel’s rules).
To only secure traffic to specific online destinations, click Manual and enter the domains and IP addresses in the table below.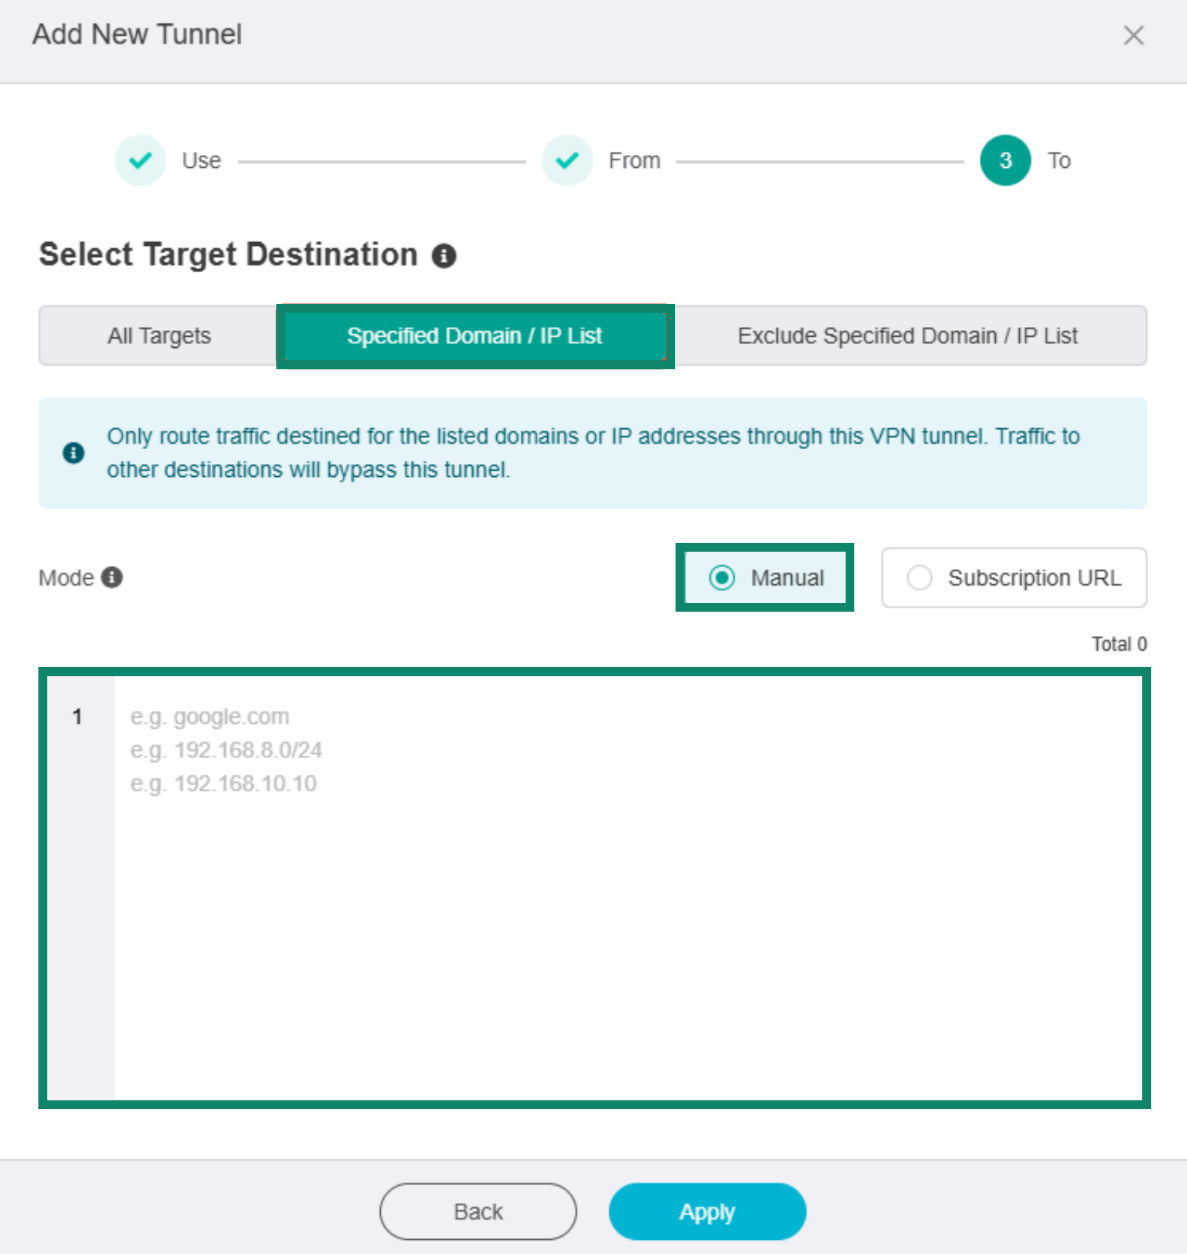
Exclude Specified Domain / IP List
The websites or IP addresses you list here will bypass the VPN tunnel (and use your local internet connection or another tunnel’s rules). Traffic to all other online services will be routed through the VPN tunnel.
To exclude specific online destinations from the VPN tunnel, select Manual and enter the desired website and IP addresses in the table below.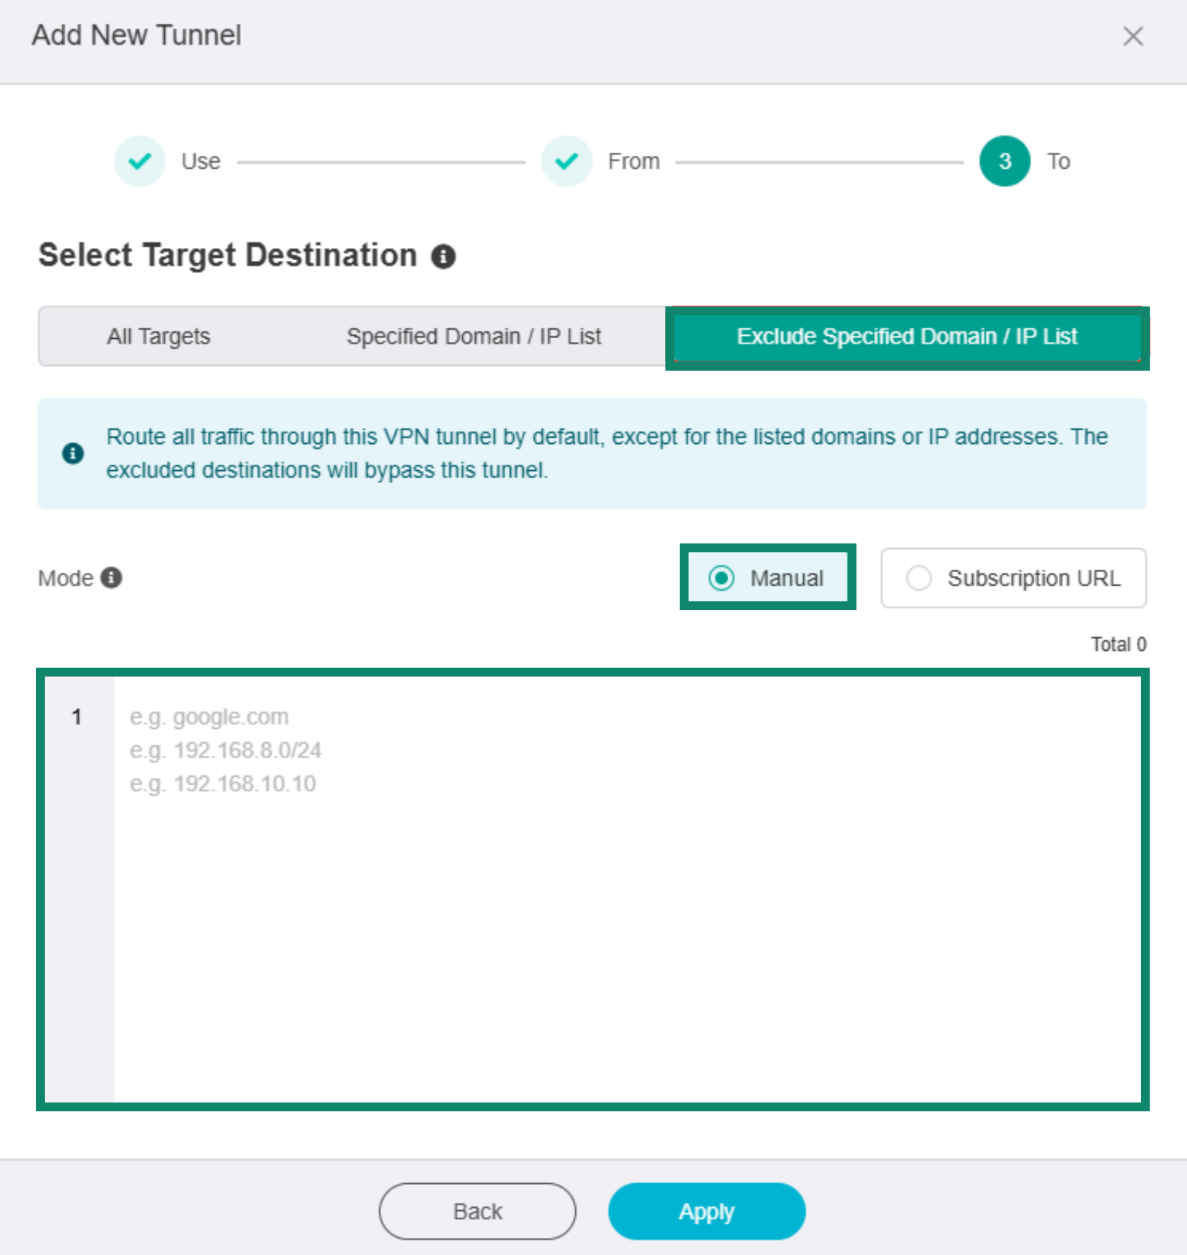
Click the desired rule, configure website and IP address rules if necessary, and click Apply.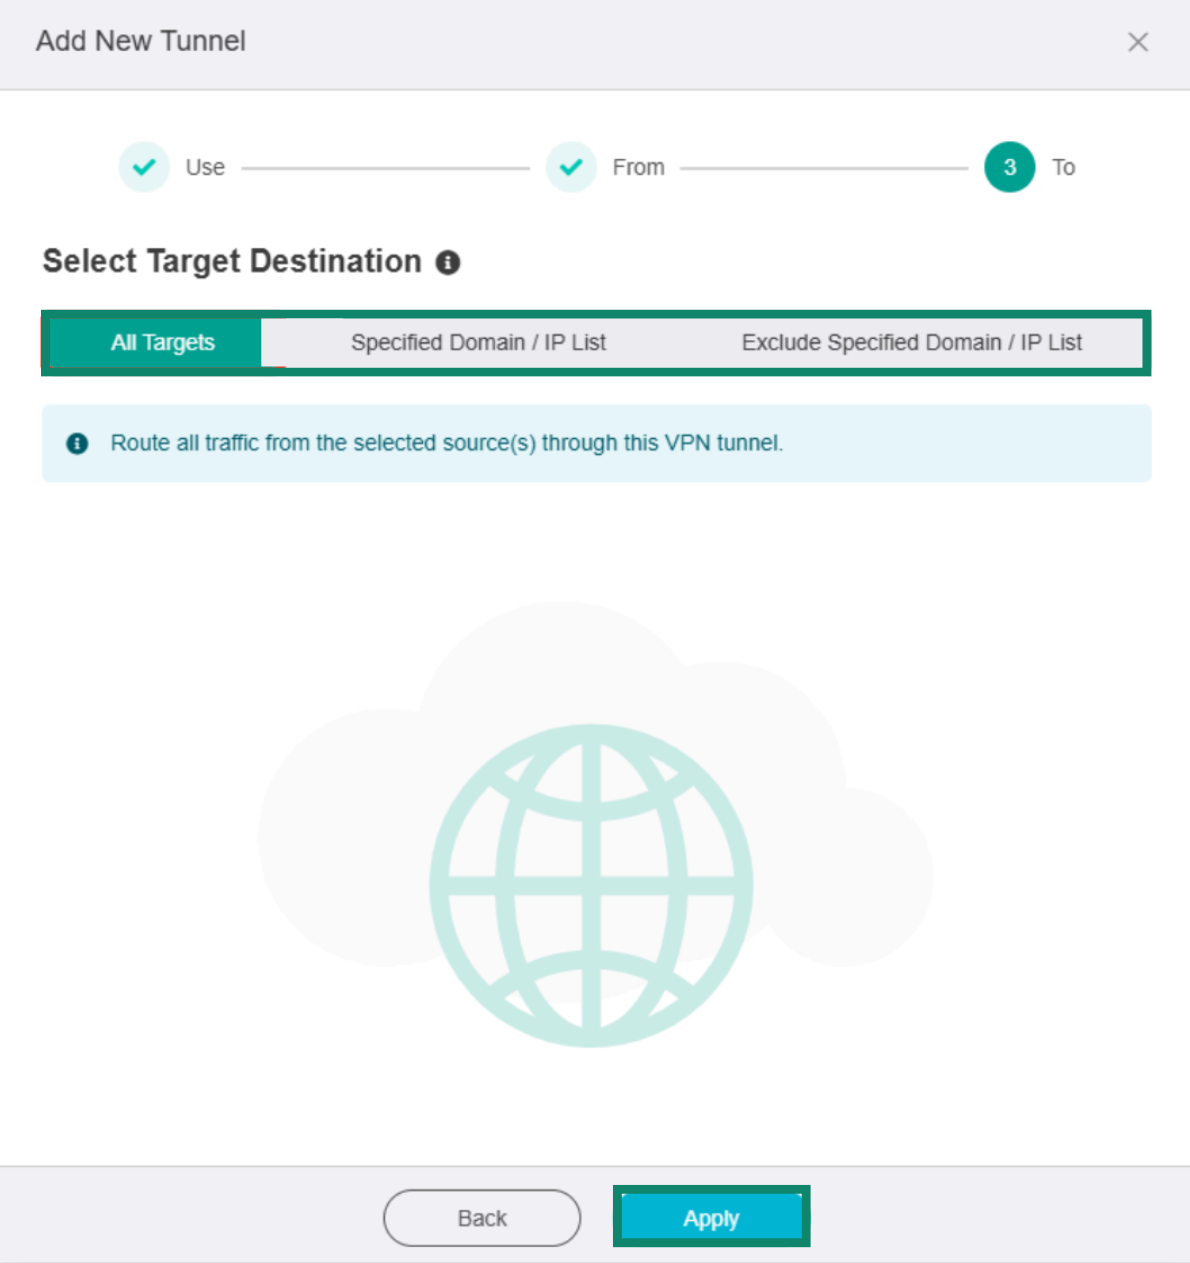
The VPN tunnel will be created and added to the ExpressVPN Dashboard, where you will be redirected. You can now activate the VPN tunnel or add additional tunnels.
Need help? Contact the ExpressVPN Support Team for immediate assistance.
Activate a VPN tunnel
To activate a VPN tunnel:
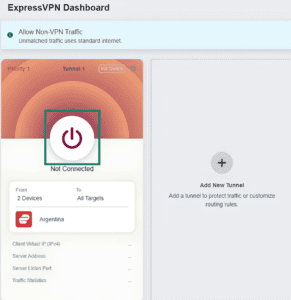
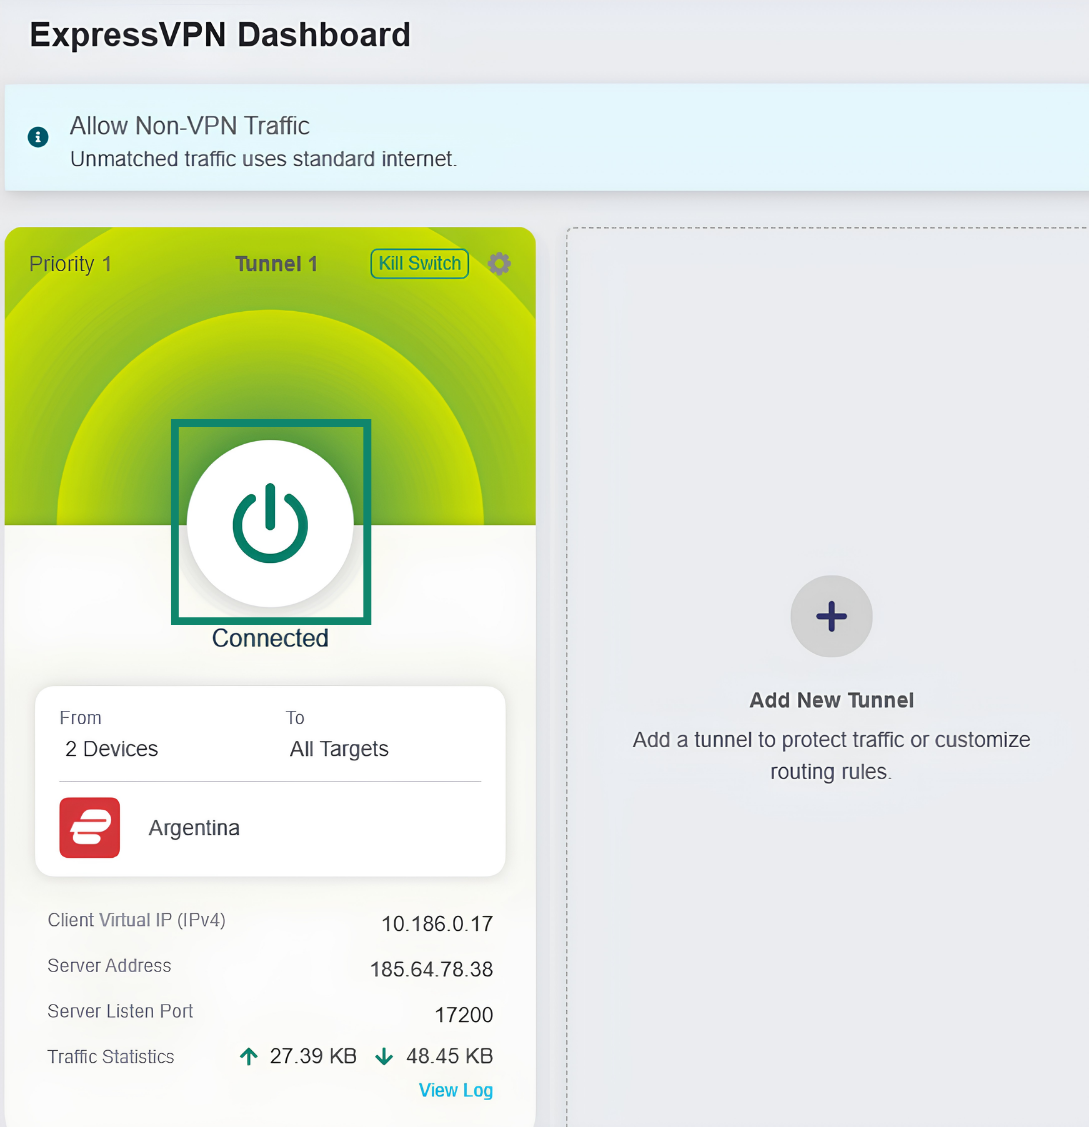
- In the ExpressVPN Dashboard, click the power button on the tunnel you want to activate.

- If the connection is successful, you will see Connected displayed under the power button.
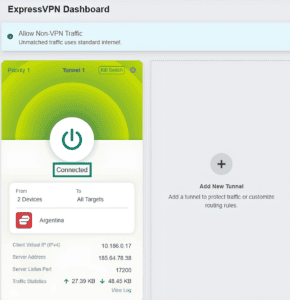

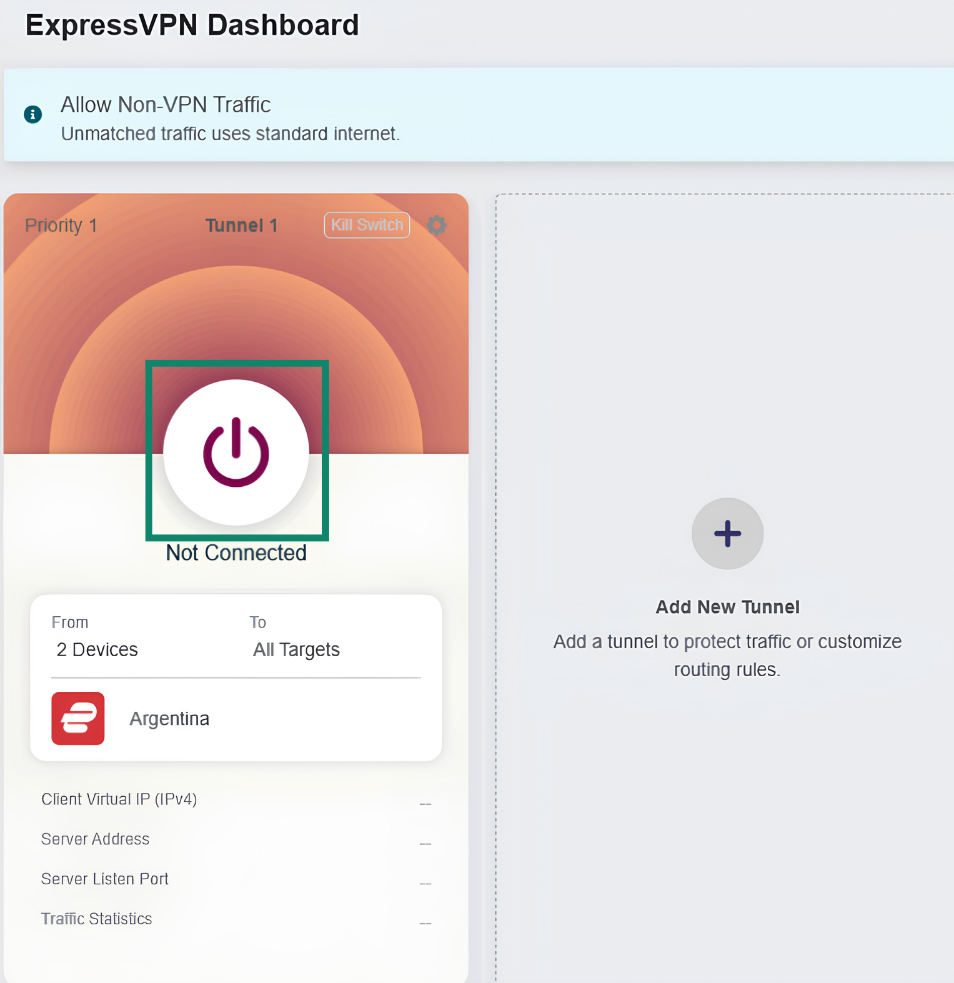
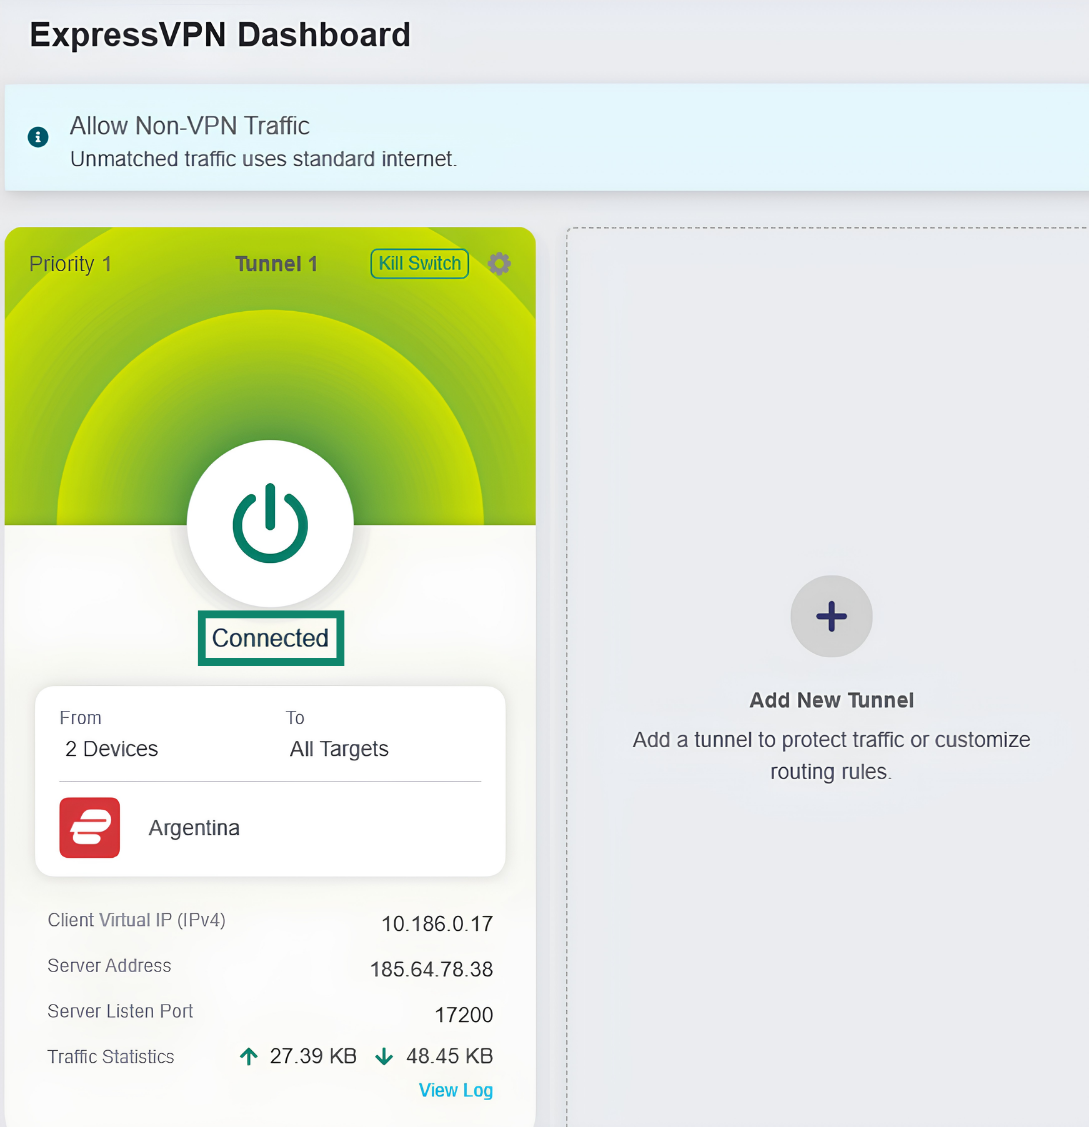
Now, the devices or connection types you configured earlier will be connected to the VPN server location you selected for this tunnel, following any specific rules you set for target domains or IP addresses.
To make sure the VPN is working, access our IP checker page on a device matching the criteria for this tunnel. You will know the VPN is working properly if the results show an IP address range and country that matches your chosen VPN profile.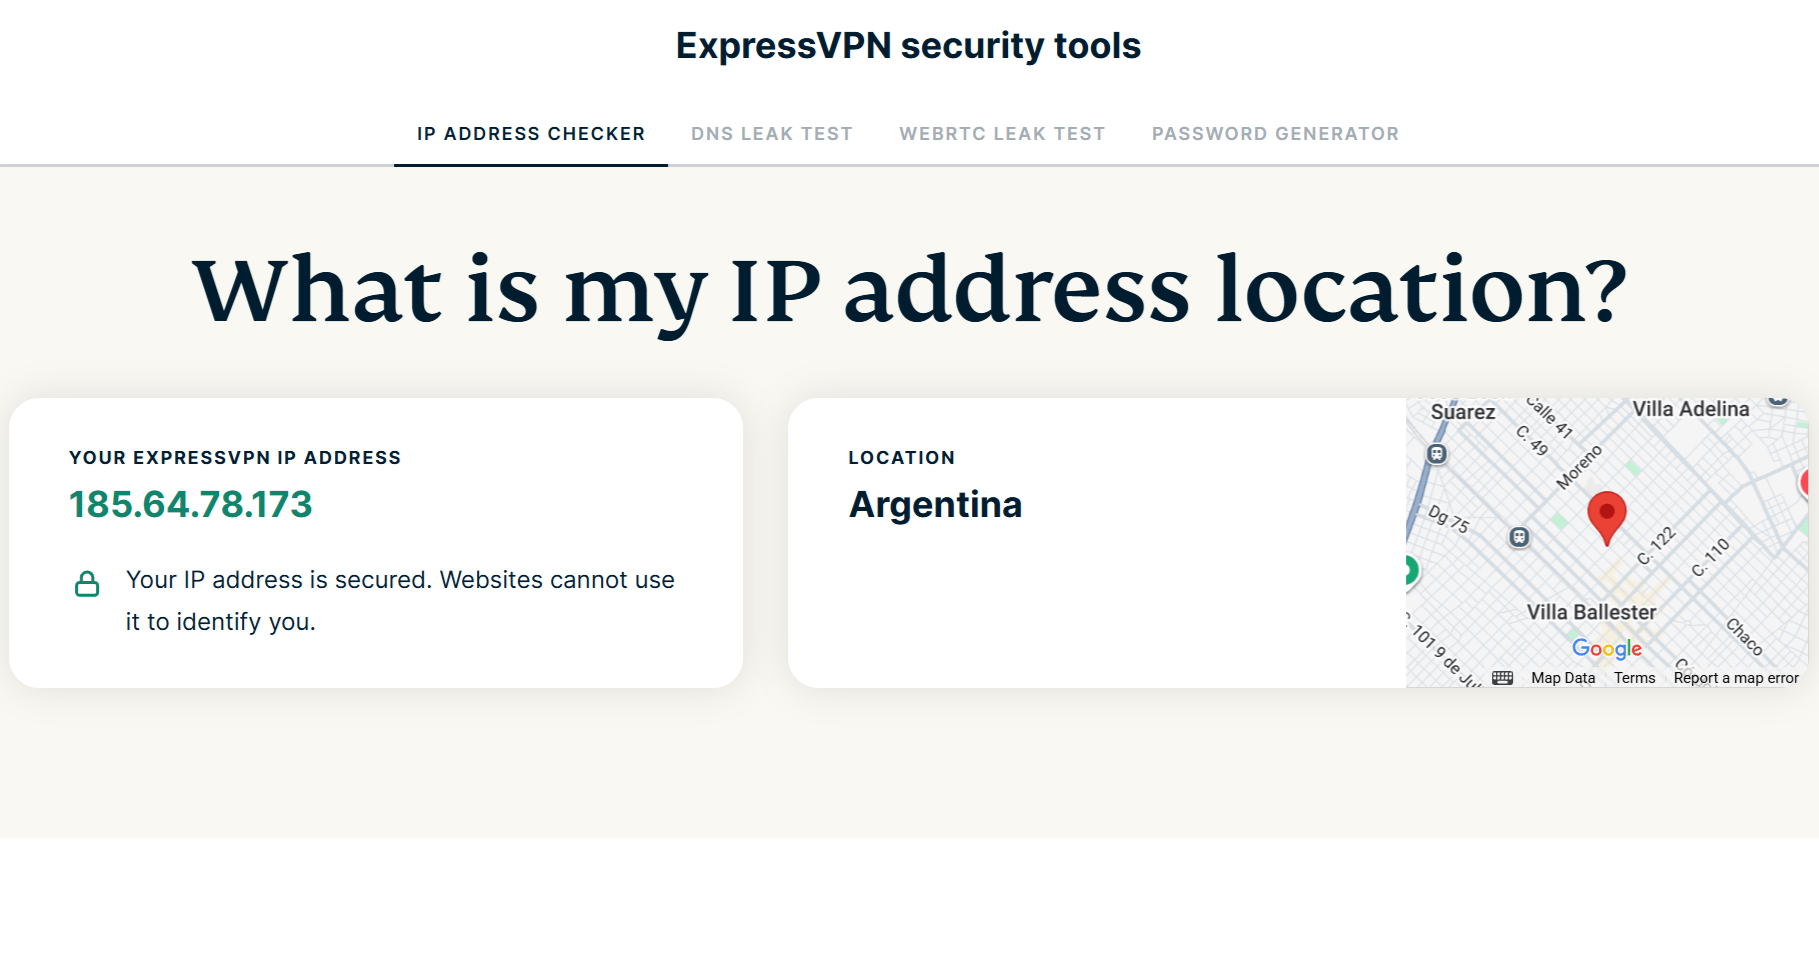
Need help? Contact the ExpressVPN Support Team for immediate assistance.
Deactivate a VPN tunnel
To turn off an active VPN tunnel:
- In the ExpressVPN Dashboard, click the power button for the VPN tunnel you want to deactivate.
- To confirm the VPN tunnel is disabled, look for a Not Connected status under the power button.
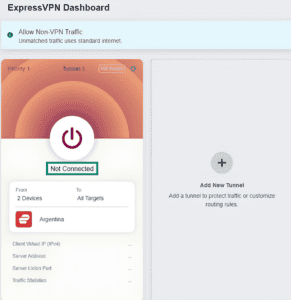
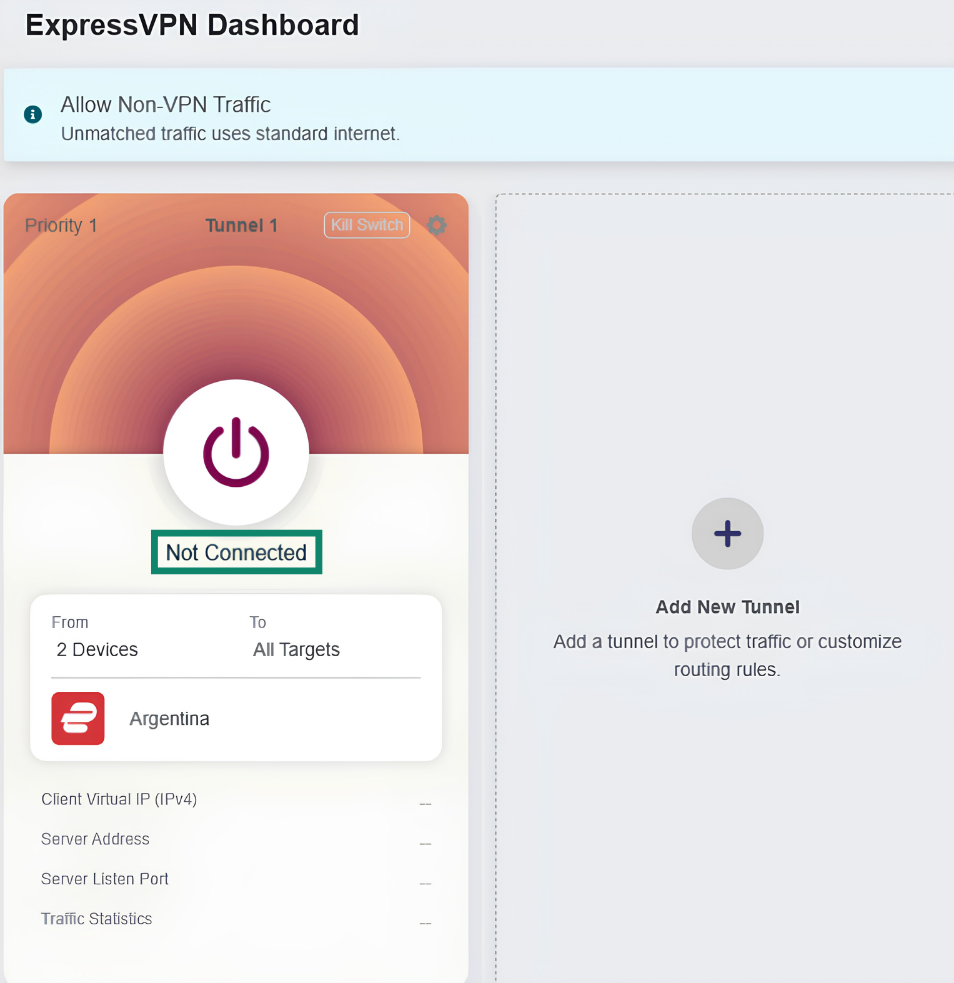
Now, your traffic will be routed through your regular internet connection and not protected by the VPN, unless you have set up and activated any additional tunnels.
Need help? Contact the ExpressVPN Support Team for immediate assistance.
Add additional VPN tunnels
You can add extra VPN tunnels to manage different types of devices, networks, or online destinations. For example, you could use one VPN tunnel to protect web browsing traffic from all network devices and a second tunnel that has separate rules for a specific streaming device or games console.
You can also create additional tunnels set to different server locations to easily switch between them. For instance, you could add a tunnel for all connected devices that is set to the U.S. and another tunnel for all connected devices that is set to Argentina. When you want to change locations, you simply enable the desired VPN tunnel and turn off the other one.
To add an additional VPN tunnel, click Add New Tunnel on the ExpressVPN Dashboard. Then, follow the steps above to configure connection profiles and rules.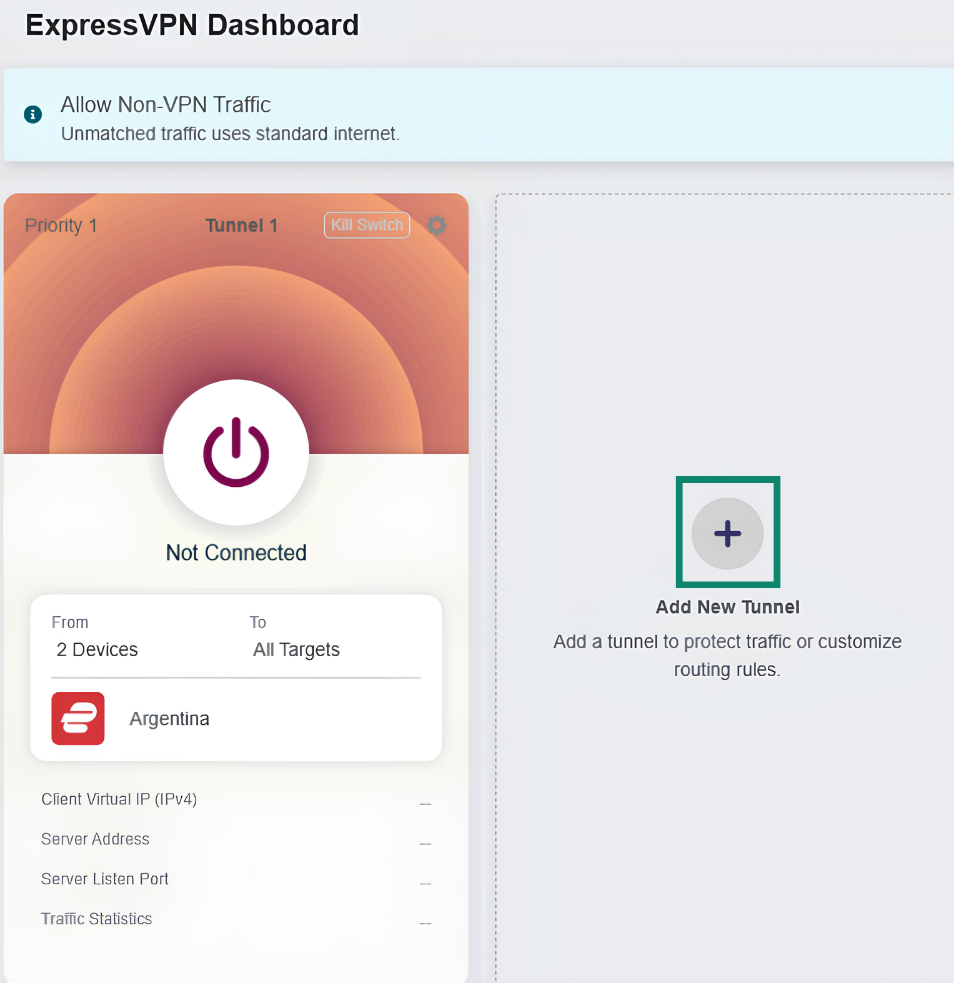
Configure VPN tunnel priority
If you set up multiple VPN tunnels, you can set a priority order. This tells the router which tunnel rules to follow in case multiple tunnels with conflicting rules are enabled at the same time.
When you enable multiple VPN tunnels, your traffic will look for rules following the priority order:
- Traffic will first be matched against the highest-priority VPN tunnel rule.
- If traffic doesn’t match that tunnel’s rules, it will check the rules in the next priority tunnel and follow them, and so on.
- VPN tunnels operate independently, so once traffic matches a tunnel’s rules, it will be routed through that VPN connection and will not switch between tunnel groups.
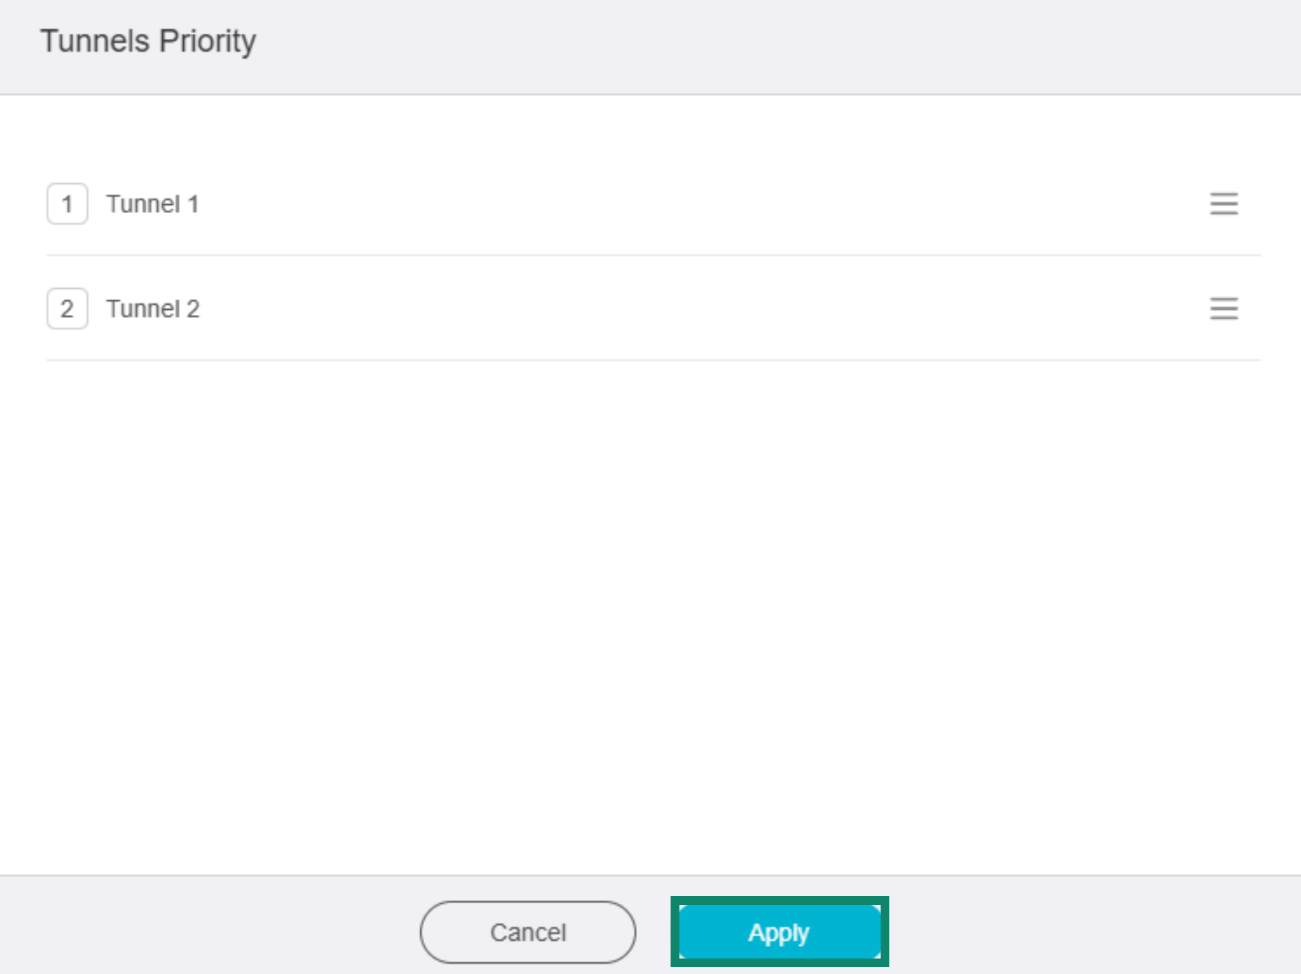
To adjust tunnel priority:
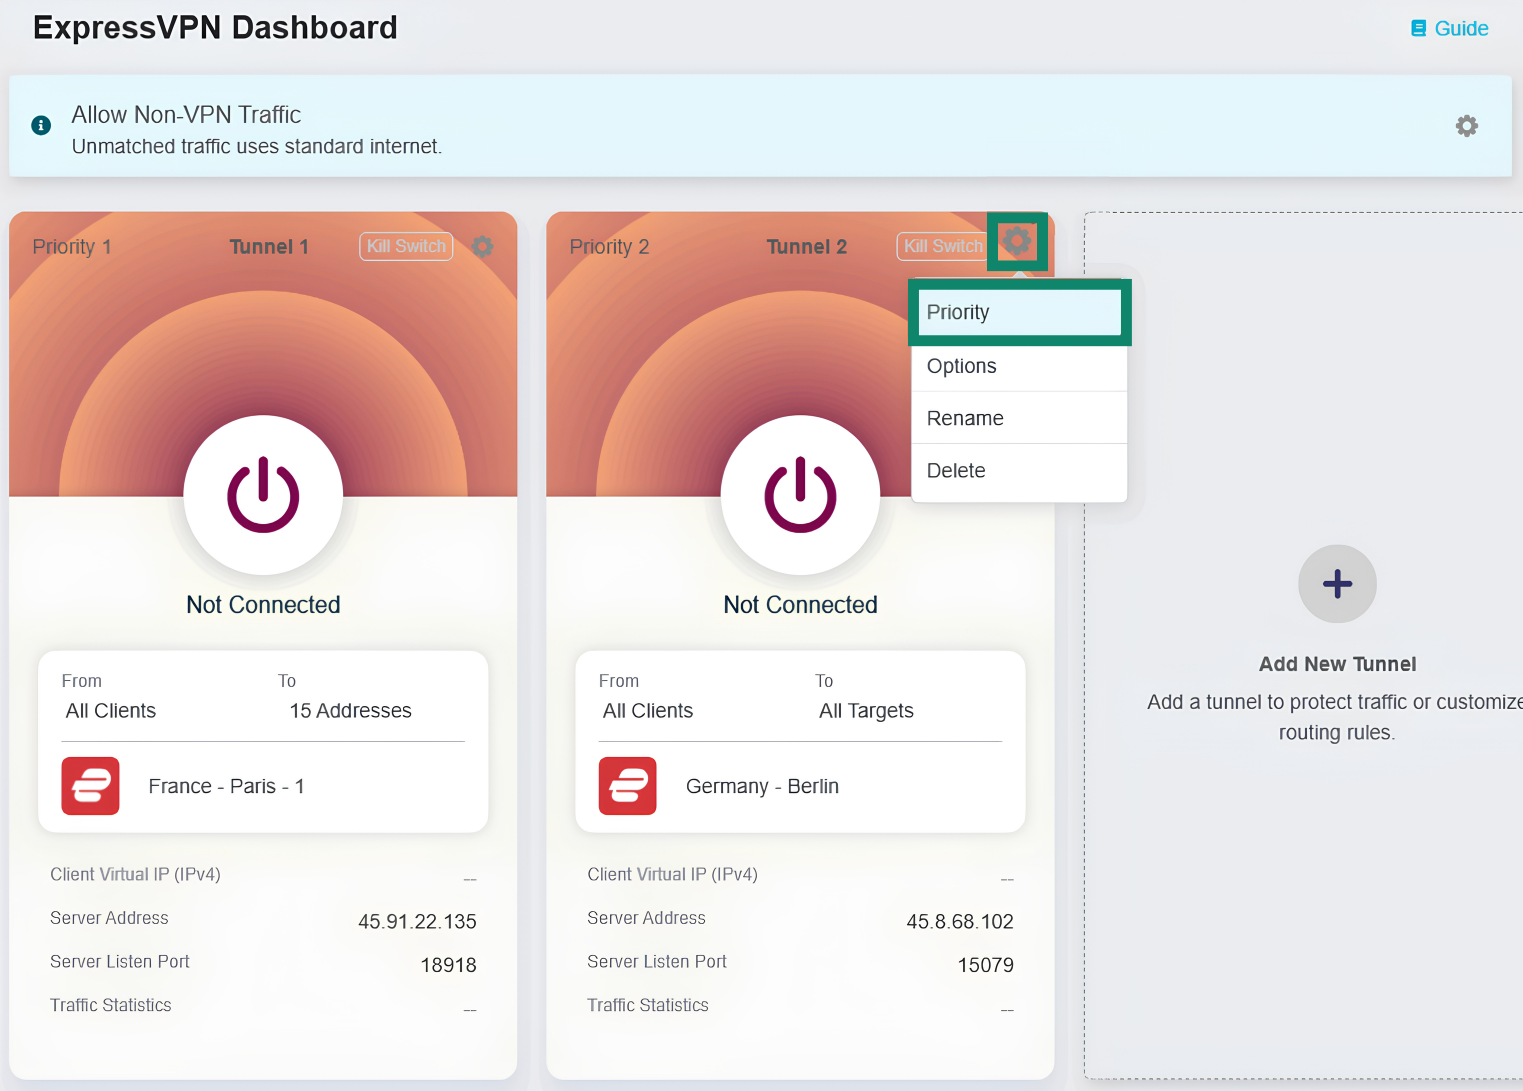
- Click the gear icon for a tunnel group and select Priority.


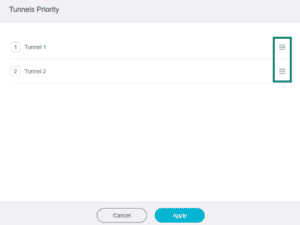
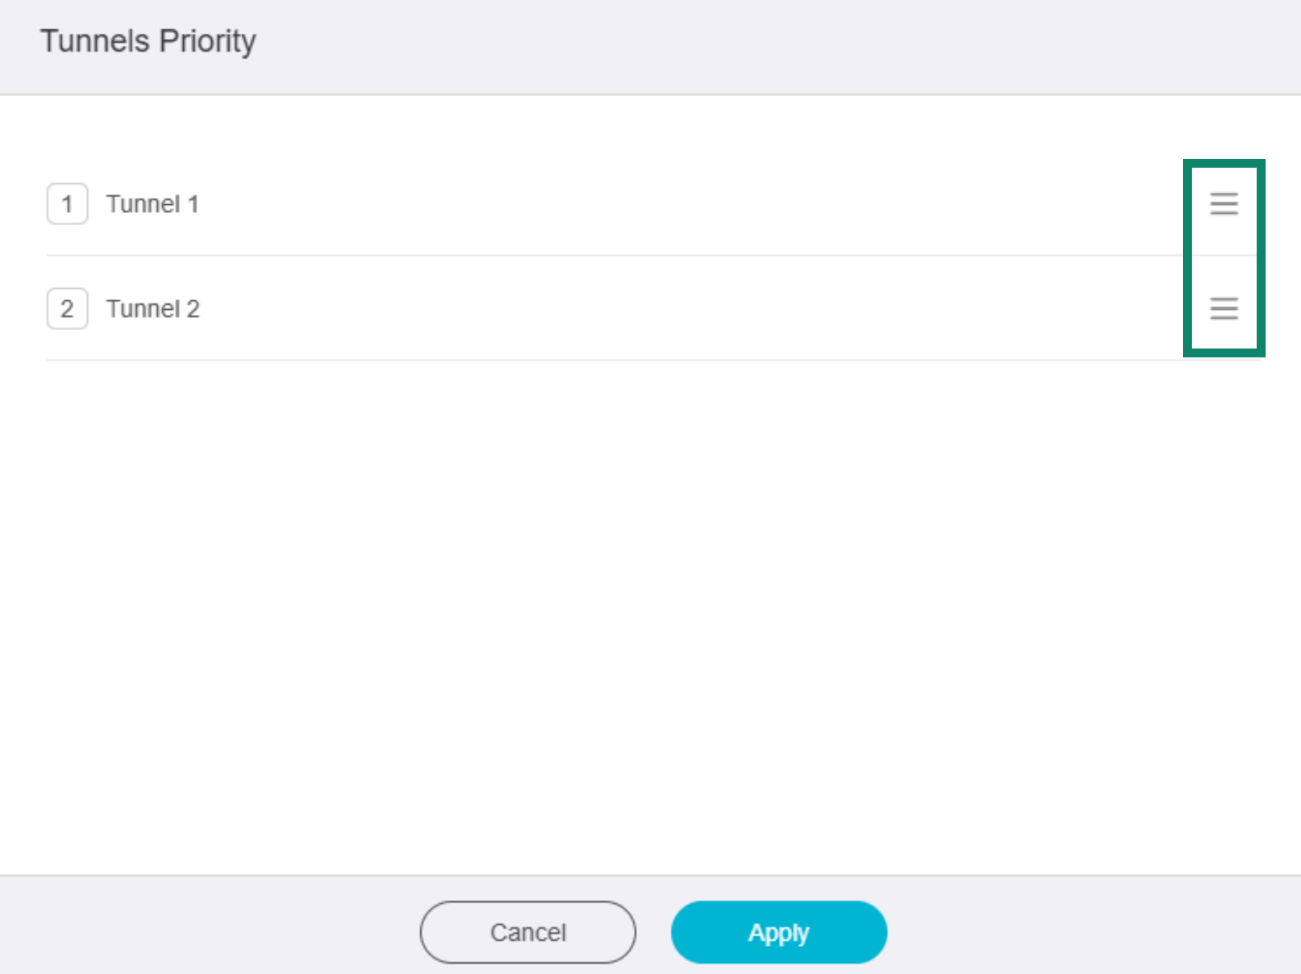
- Click and hold ☰ on the right to reorder the VPN tunnels.

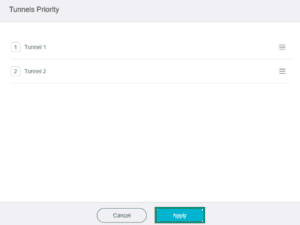
- When finished, click Apply.
Need help? Contact the ExpressVPN Support Team for immediate assistance.
Rename a tunnel
To rename a VPN tunnel, click the gear icon for the VPN tunnel you want to rename. Then, click Rename, enter the desired name, and save the changes.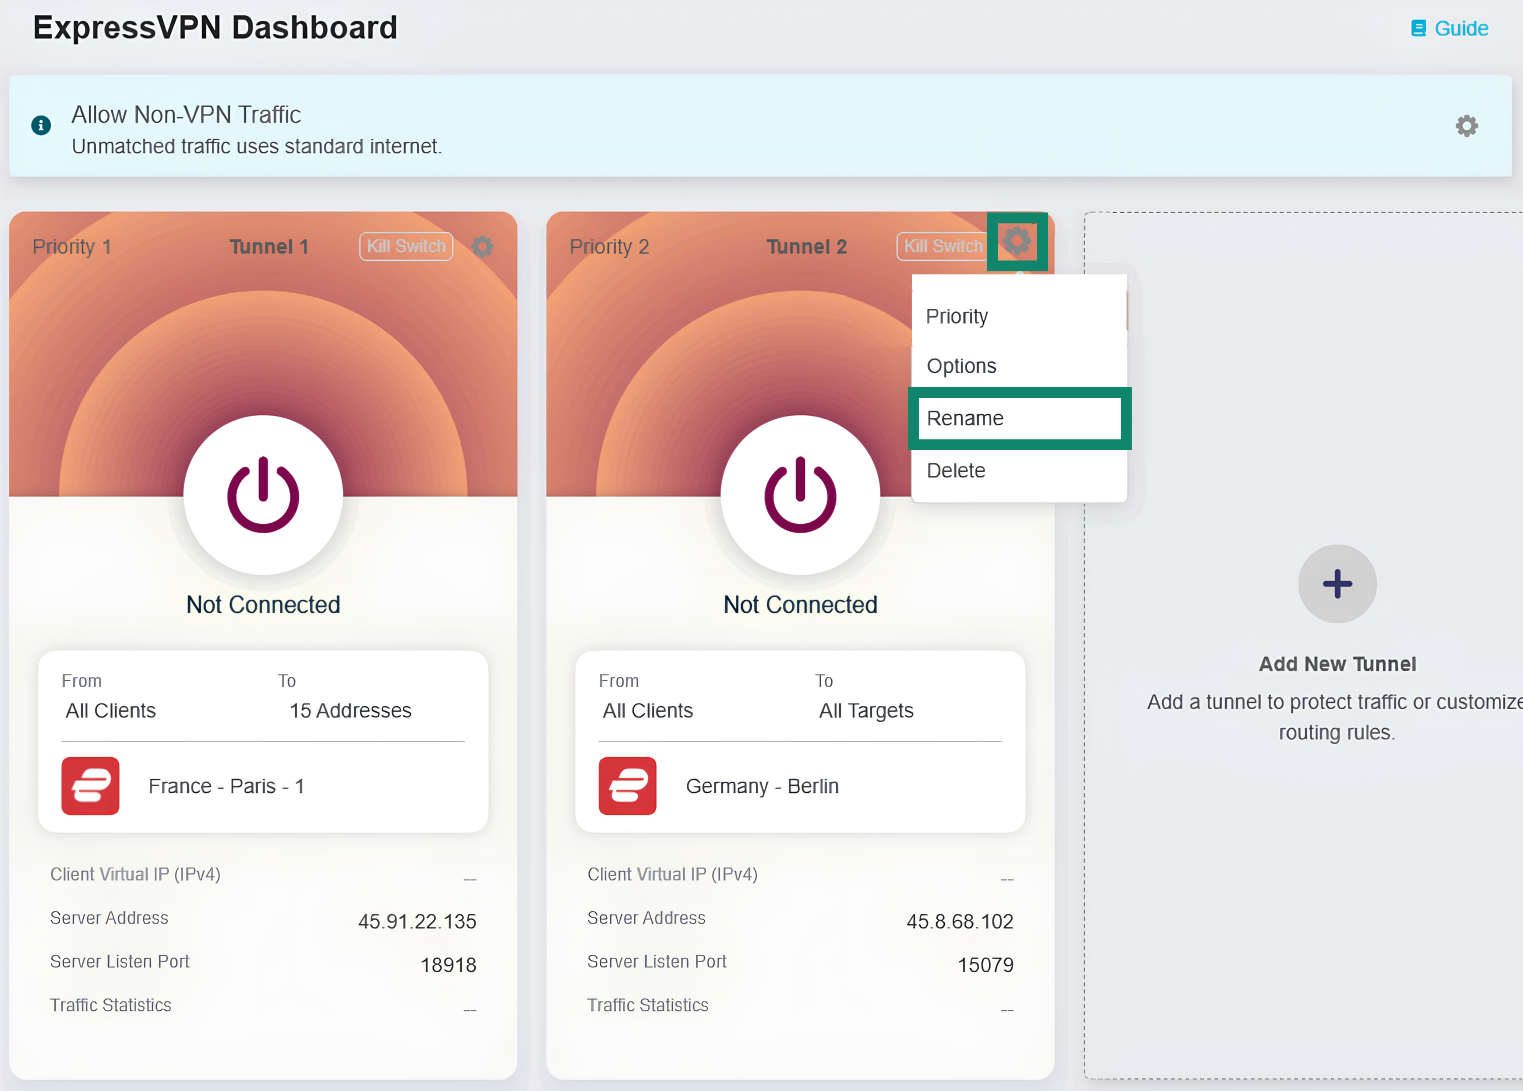
Need help? Contact the ExpressVPN Support Team for immediate assistance.
Delete a tunnel
To delete a VPN tunnel, click the gear icon for the VPN tunnel you want to remove. Then, click Delete and confirm your choice if prompted.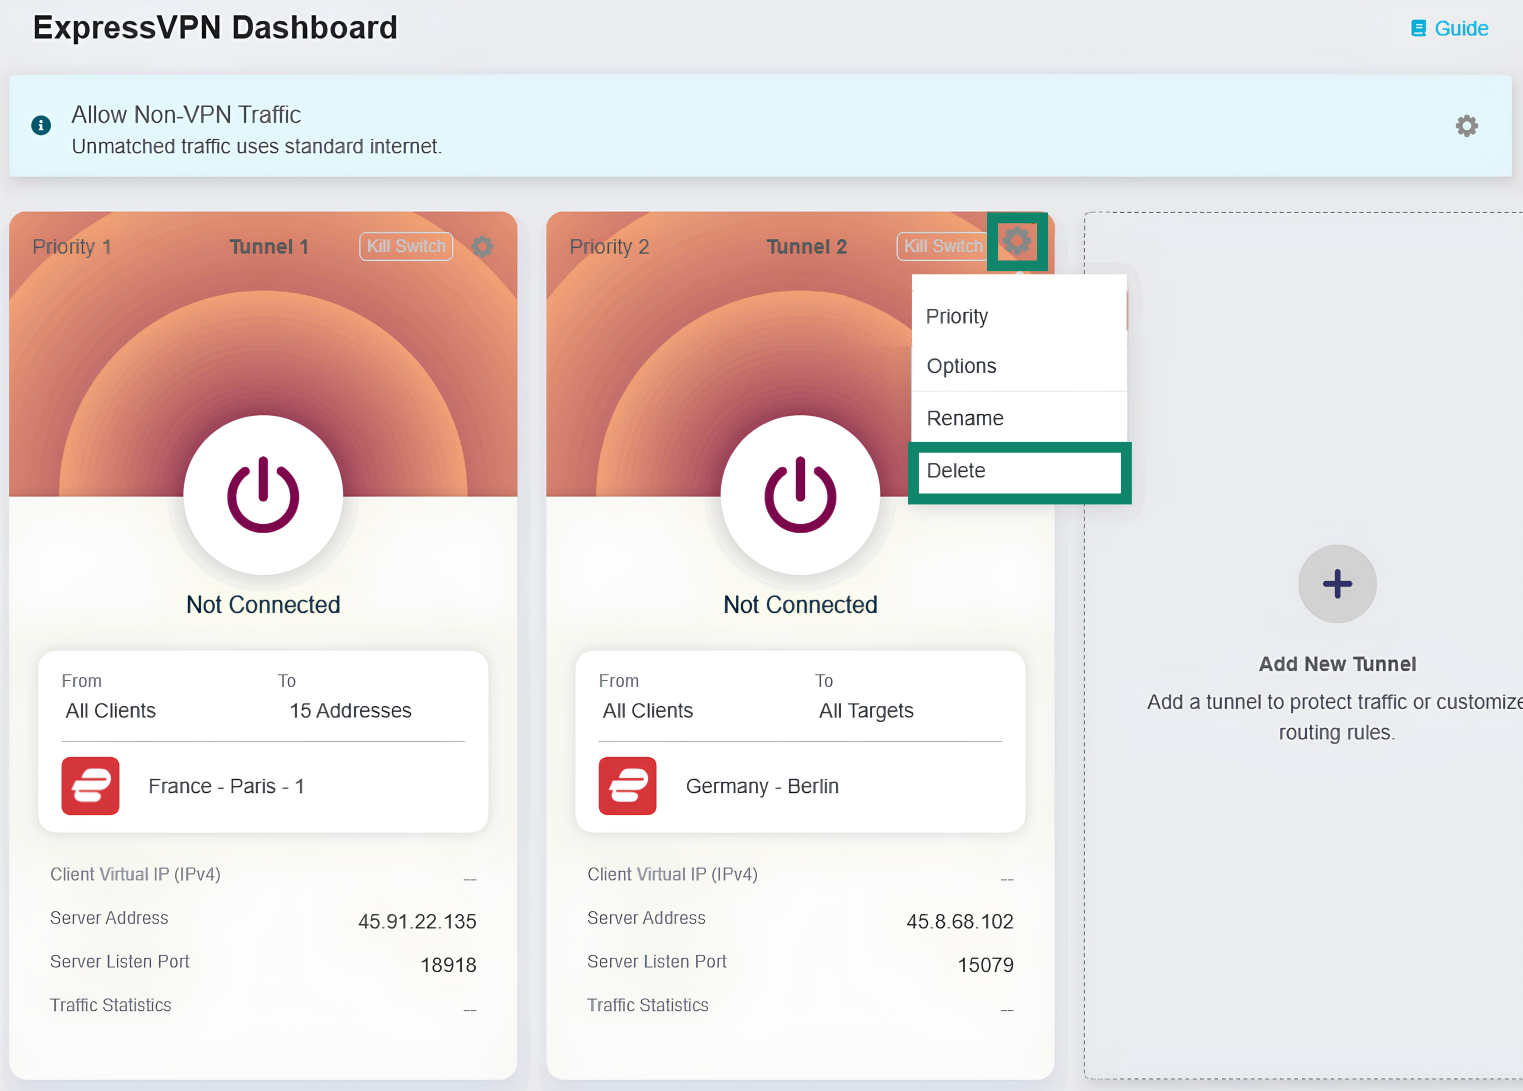
Need help? Contact the ExpressVPN Support Team for immediate assistance.