This guide will show you how to send emails using your ExpressMailGuard aliases. This allows you to initiate a conversation without first having to receive an email you can reply to.
To use an alias to send emails, you first need to create the receiving email address in the correct way.
As an example, let’s say you have created the alias default@expressmailguard.com and you want to send an email to hello@example.com.
When adding the recipient’s email address in the To:field of your chosen email client (for example, Gmail), you would need to enter the following:
default+hello=example.com@expressmailguard.com.

If you do not want to type out the entire recipient email address and wish to avoid potential errors, ExpressMailGuard can generate the correct recipient email address for you. To do so:
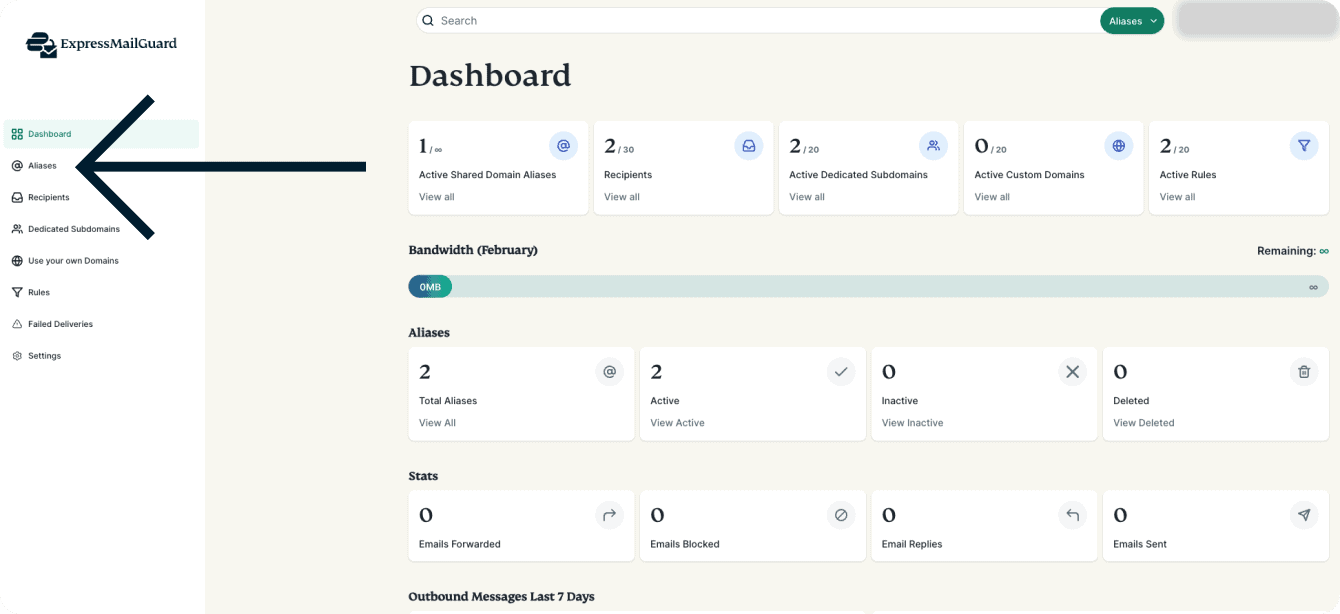
- On the ExpressMailGuard dashboard, click Aliases.

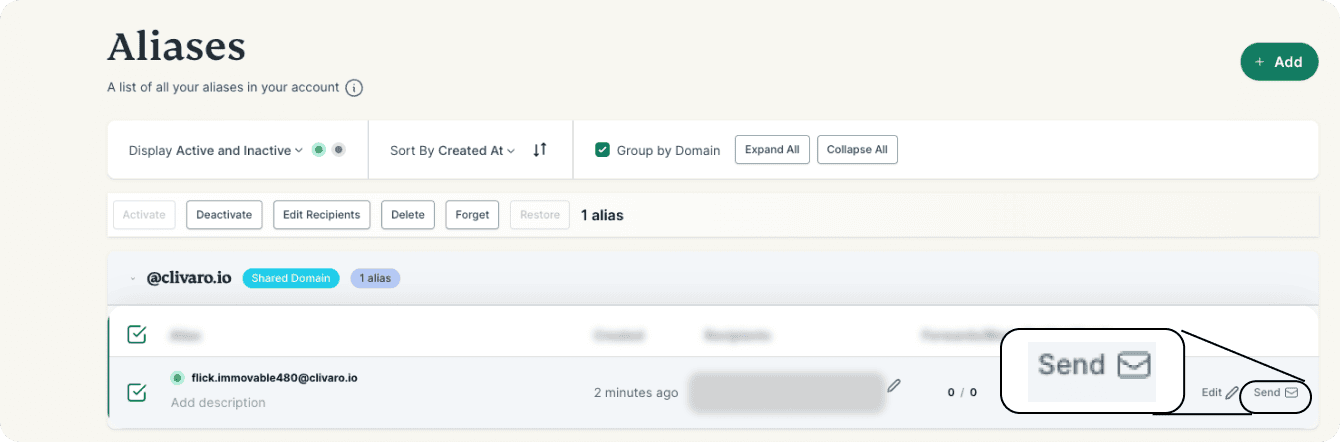
- Find the alias you want to send an email from and click Send.

- Enter the email destination address in the field marked To email destination.


- You can then copy the generated address to your clipboard by clicking it, or select Open Mail App to draft an email using this address from your default chosen email client.

Once you have created the correct email address, you can then send the email exactly as you would any other. To check that the email has been sent successfully, look in your dashboard at the sent count column and see if it has been incremented for that alias.
Need help? Contact the ExpressVPN Support Team for immediate assistance.